


Zenless Zone Zero Claret Build: 1,800 DEF and the Six-Maim Rotation
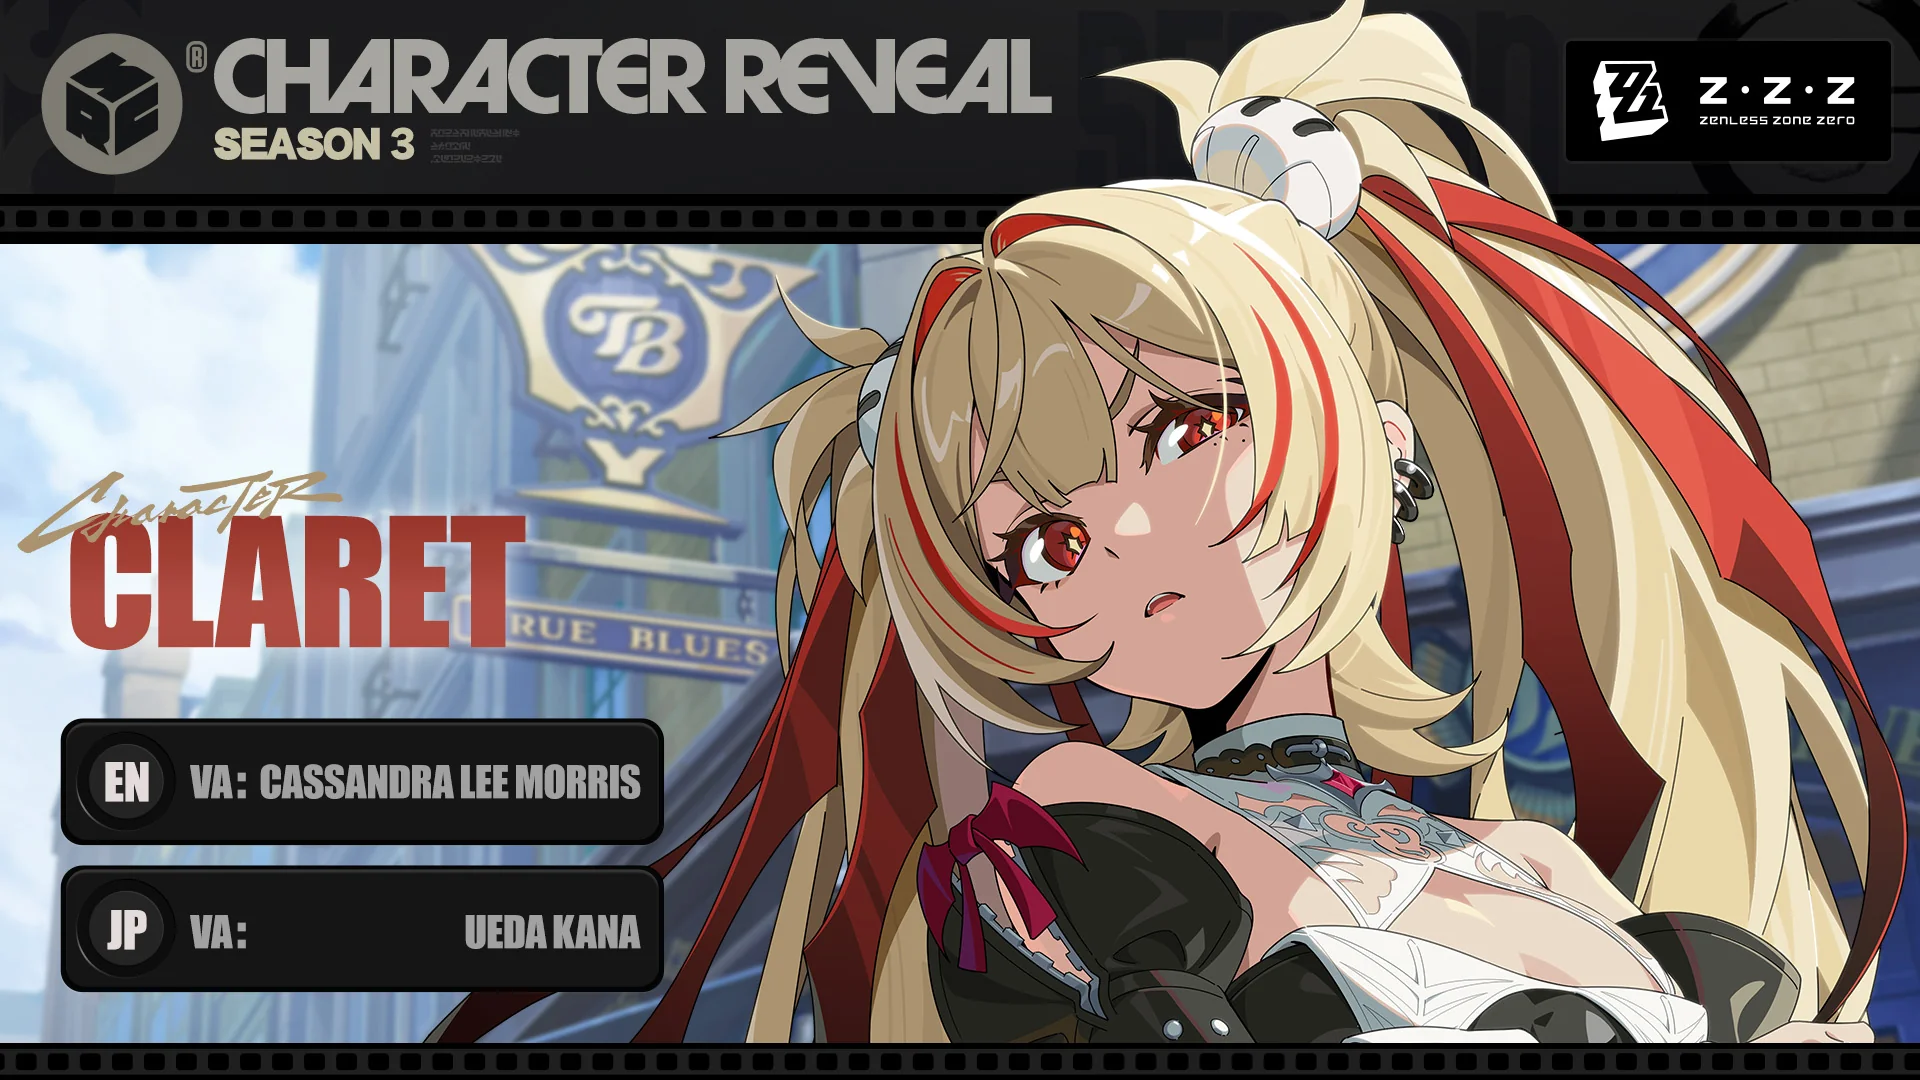
Claret arrived with Zenless Zone Zero Version 3.2 as the game's first Electric Armorer, and building her like a conventional Attack Agent wastes the mechanics that make her strong. Her skill multipliers use DEF, her CRIT system replaces normal CRIT DMG with Laceration, and her main burst comes from consuming Gash to trigger Maim. Players preparing for her current limited Signal Search or optional W-Engine pulls can use Topuplist as a game recharge platform and check the Zenless Zone Zero top-up page for in-game currency, but the first priority after obtaining Claret is understanding her unusual damage rules rather than spending for extra copies.
 Zenless Zone Zero



The short build answer is straightforward: equip four pieces of Thorned Rose, reach at least 1,800 initial DEF, use CRIT Rate on Drive Disc 4, PEN Ratio on Disc 5, and DEF% on Disc 6. Crimson Thirst is her strongest W-Engine, while Bloodmarrow Coffer and Catty Luck are the practical alternatives. The harder part is execution. Claret must enter Crimson Inscription, build Gash with enhanced attacks, use tap or hold Specials to trigger Maim at the right time, and preserve enough transformation duration for the enemy's Stun window.
Current Version 3.2 availability: Claret's debut phase began on September 9 and is scheduled to run through September 30, 2026. She is a limited S-Rank Electric Armorer, so players can test her released combat loop before deciding whether to pursue her W-Engine or Mindscapes.
Why Claret Breaks Normal DPS Building Rules
Claret's Core Passive classifies all damage from her skills as Sharp DMG and bases those skill multipliers on DEF. This means DEF is both an offensive and defensive stat for her. ATK rolls and ATK-only buffs do not improve her skill multipliers in the way they improve a standard Attack Agent, so an apparently strong generic DPS piece can be a poor Claret piece if it sacrifices DEF and CRIT Rate.
Her critical system changes the second familiar rule. When Sharp DMG scores a critical hit, it uses the Laceration DMG Bonus instead of ordinary CRIT DMG. Claret's initial CRIT DMG is not completely useless because her Core Skill converts every 1% of initial CRIT DMG into 0.35% initial CRIT Rate. However, direct CRIT Rate is still the more efficient substat, and regular CRIT DMG buffs do not directly raise the fixed Laceration multiplier.
CRIT Rate also remains valuable after 100%. Once a hit passes the first critical check, any CRIT Rate above 100% becomes the chance for an additional Laceration check on that same damage instance. At 140% CRIT Rate, the first check is guaranteed and the second has a 40% chance. At 200%, both checks become guaranteed. That is why a finished Claret build can legitimately keep chasing CRIT Rate long after another damage dealer would stop.
Mechanic | What it does | Build consequence |
|---|---|---|
Sharp DMG | All of Claret's skill damage uses DEF-based multipliers | Prioritize DEF, not ATK, for her offensive foundation |
Laceration | Replaces normal CRIT DMG when Sharp DMG crits | Direct CRIT Rate is more valuable than ordinary CRIT DMG stacking |
Second Laceration check | Excess CRIT Rate above 100% can trigger another check | In-combat CRIT Rate can keep scaling toward 200% |
Gash | A separate enemy gauge that stores up to three stacks | Prepare stacks before the important Stun window |
Maim | Consumes Gash through specific Crimson Inscription Specials for burst AoE damage | Judge rotation success by useful Maim triggers, not field time alone |
Sharpness | Claret's special resource, separate from normal Energy | Energy Regen does not solve her resource cycle |
The 1,800 DEF Breakpoint Comes Before Perfect CRIT Rolls
Thorned Rose is designed for Armorer Agents. Its two-piece effect gives 16% DEF. The four-piece effect adds damage and provides tiered CRIT Rate bonuses when the Agent reaches its initial DEF thresholds, with the full bonus unlocked at 1,800 initial DEF. The word “initial” matters: check the pre-combat character sheet rather than assuming a temporary battle buff satisfies the condition.
For a fresh build, reach 1,800 initial DEF first. Falling just below that line costs part of the set's CRIT Rate bonus and makes the rest of the build harder. After the threshold is secured, continue improving CRIT Rate and DEF together. Well-developed endgame builds can move beyond 2,300 DEF, but 1,800 is the functional gate that should determine whether an early Disc is usable.
The long-term CRIT goal is not a single number shown outside combat. Claret gains CRIT Rate from her Core upgrades, combat state, W-Engine, Thorned Rose, teammates, and the conversion from initial CRIT DMG. Add those sources before judging the build. A player using Crimson Thirst and a CRIT support may need fewer CRIT substats than a player using Catty Luck. Aim to exceed 100% reliably in combat first, then push toward 200% only after the DEF breakpoint and rotation are stable.
Practical stat order: reach 1,800 initial DEF, make the first Laceration check reliable, then improve excess CRIT Rate for the second check. Do not sacrifice the DEF breakpoint merely to display a larger CRIT number.
Best Drive Discs and Main Stats
The stable core is four-piece Thorned Rose. The two-piece set is flexible because team buffs change which stat becomes saturated. Puffer Electro is especially strong in Rina teams because PEN Ratio remains useful when general damage bonuses are already plentiful. Woodpecker Electro is the simple answer when the build needs more CRIT Rate, while Soul Rock can help an unfinished build reach the DEF requirement. Thunder Metal can work when its Electric conditions are consistent, but it should not replace clearly better substats just to complete a theoretical combination.
Slot | Preferred main stat | Reason |
|---|---|---|
Drive Disc 4 | CRIT Rate | Helps secure the first Laceration check and build toward the second |
Drive Disc 5 | PEN Ratio | Scales well in high-defense content and pairs naturally with Rina |
Drive Disc 6 | DEF% | Directly supports Sharp DMG multipliers and the Thorned Rose threshold |
Use the following substat priority as a default: CRIT Rate, DEF%, CRIT DMG, PEN, then flat DEF. CRIT DMG sits below direct CRIT Rate because only part of it becomes CRIT Rate through the 0.35 conversion. Flat DEF is not worthless, but percentage DEF scales better once Claret's base stat, W-Engine, and set bonuses are established.
Disc 5 has the most room for adjustment. PEN Ratio is the safest high-end recommendation, especially with Rina and Puffer Electro. Electric DMG can remain competitive in a team with less PEN support, and a DEF% Disc can temporarily solve a weak stat sheet. Compare complete pieces rather than their main stat alone: a PEN Ratio Disc with no useful substats may lose to an Electric or DEF option with several strong rolls.
W-Engine Choices: Signature, Battle Pass, and Craftable
Crimson Thirst
Crimson Thirst is Claret's best overall W-Engine because every major part of it matches her kit. Its DEF-oriented stat line supports Sharp DMG, while its passive adds CRIT Rate, Electric DMG, and Electric Sharp DMG. The Sharp-specific bonus is particularly useful because it occupies a less crowded multiplier category, and the effect is easy to maintain through EX Special use and Maim triggers.
The signature also reduces the hardest gearing pressure: CRIT Rate. A Catty Luck build can reach the DEF requirement easily but must find more CRIT through Discs and teammates. Crimson Thirst solves both sides at once, which is why the damage and build-comfort gap is larger than it appears from a single passive line.
Bloodmarrow Coffer
Bloodmarrow Coffer is the strongest practical alternative for players who already have access to it through the Battle Pass. It provides CRIT Rate and rewards a build that pushes above 100%, matching Claret's second Laceration check. At high refinement it approaches the craftable option's damage while making the stat sheet easier to finish. Its limitation is access: it is not the universal free choice.
Catty Luck
Catty Luck is the recommended craftable fallback. It focuses heavily on DEF and maintains its additional DEF effect through EX Special use, an action Claret performs naturally. It can meet the 1,800 threshold comfortably and remains fully functional at low investment. The tradeoff is that it supplies no direct CRIT Rate, so Drive Disc 4 and substats carry more of the Laceration burden.
For most accounts, the order is simple: use Crimson Thirst if it is already owned or deliberately budgeted, use Bloodmarrow Coffer when its CRIT Rate solves the build, and craft Catty Luck when preserving pulls matters more than the highest ceiling. Do not equip an off-specialty ATK stat stick just because its rarity is higher; Claret cannot activate another Specialty's passive, and ATK does not serve her DEF-based skill multipliers.
How Gash, Maim, and Crimson Inscription Fit Together
Claret enters the field with 60 Sharpness. Spending 60 Sharpness on her EX Special activates Crimson Inscription for 16 seconds and changes her attacks into the Blood Axe sequence. Her enhanced attacks build the enemy's Gash gauge. When the gauge fills, the target gains one Gash stack, up to a maximum of three.
While Crimson Inscription is active, Claret's tap Special consumes one Gash stack to trigger one Maim. Holding the Special can consume up to three stacks and trigger multiple Maims quickly. Tap is the flexible pressure tool: use it outside Stun when the gauge is about to overcap, the enemy is about to move, or the team needs immediate damage. Hold is the burst tool: use it when three stacks and a safe damage window are ready.
After a Special triggers Maim, Claret can shortcut into her alternate Basic, then continue directly into the third hit of her enhanced Basic string. That third hit is important because its repeated slashes and downward smash build Gash efficiently. The second hit and the finishing leap also contain Perfect Dodge opportunities. Successfully using the built-in dodge timing lets Claret keep the combo flowing instead of abandoning it for a standard Dodge Counter.
Crimson Inscription pauses while Claret is fully off field, and it also pauses during her Chain Attack, Ultimate, Counter Assist, and Assist Follow-Up. Her Chain Attack extends the state by two seconds. This makes short swaps part of the intended rotation: refresh a support buff, apply Daze with a Stun Agent, then return without wasting the entire transformation. One detail matters during manual swaps: if Claret is swapped out in the middle of an animation, the timer continues until she has actually left the field.
Normal Field Rotation: Build Without Overcapping
Set support effects first. Apply Rina's PEN support or Nicole's DEF reduction before committing Claret to a long field sequence.
Enter Crimson Inscription with EX Special. This spends the initial 60 Sharpness and unlocks the enhanced Blood Axe attacks.
Use enhanced Basics to build Gash. Hold or repeat the third Basic when the enemy pattern allows, and use its built-in Perfect Dodge window rather than cancelling too early.
Tap Special when one stack should be spent now. Prevent Gash overcap, punish a short opening, or cash out before the target leaves.
Take the alternate Basic shortcut. After Maim, continue into the later enhanced Basic string to rebuild Gash efficiently.
Swap briefly for Daze and buff upkeep. Do not give the Stun or Support Agent more field time than the setup requires.
Return before the Stun window. Try to have three Gash stacks and enough Crimson Inscription duration remaining for the burst sequence.
This rotation is not a rule that every Gash must be saved. Waiting for three stacks can lose damage if the boss is about to phase, the Stun window is far away, or the gauge would overcap. A one-stack Maim is not inherently weaker per stack. The reason to bank three is speed: holding Special lets Claret detonate several stacks inside a short Stun window.
The Advanced Six-Maim Stun Rotation
The six-Maim route is Claret's clearest burst benchmark, but it requires preparation. Enter the Stun with Crimson Inscription still active, three Gash stacks stored, and the Ultimate ready. If those conditions are missing, use a shorter rotation rather than forcing inputs after the enemy recovers.
Hold Special to consume three stored Gash stacks and trigger the first three Maims.
Trigger Claret's Chain Attack, then cancel into the Basic 3 shortcut to begin rebuilding Gash.
Trigger her Chain Attack again when the team sequence allows, then shortcut into Basic 3 again.
Use Ultimate after the second rebuilt stack. The Ultimate builds the remaining Gash, pauses Crimson Inscription, and restores 10 Sharpness.
Hold Special again to consume the new three stacks for Maim four, five, and six.
The Chain Attacks are doing three jobs at once: contributing Gash, pausing the transformation timer, and extending Crimson Inscription by two seconds. The Basic 3 shortcuts add more gauge without restarting from the first hit. Ultimate completes the second set and provides Sharpness for the next cycle. This is why randomly spending Ultimate before Stun can hurt more than its immediate damage suggests.
If the enemy has a short Stun or the first hold Special starts late, reduce the sequence. Three clean Maims plus Chain and Ultimate are better than attempting six and losing the final detonation. The practical skill test is not memorizing the list; it is reading the remaining Stun duration and deciding how much of the route still fits.
Best Team Structures for Claret
Claret's Additional Ability activates when another squad member is a Stun Agent, an Armorer, or shares her Electric attribute. When the team triggers Maim, Armorer Agents enter Remnant Edge, increasing Laceration DMG for 40 seconds. The condition is flexible enough that Claret does not need one mandatory premium teammate, but she strongly prefers partners whose buffs affect DEF-scaled damage rather than ATK alone.
Team | What each partner contributes | Who should use it |
|---|---|---|
Claret / Norma / Rina | Norma supplies fast Stun utility and helpful Chain routing; Rina provides PEN Ratio and DEF-compatible support | Best-developed premium shell with smooth resource management |
Claret / Koleda / Rina | Koleda gives a direct Stun plan; Rina covers PEN and Electric synergy | Players who want a familiar, stable Stun rotation |
Claret / Trigger / Nicole | Trigger contributes off-field Daze; Nicole groups enemies and reduces DEF without relying on ATK buffs | Accounts without Rina that can manage shorter debuff windows |
Claret / Anby / Nicole | Anby activates the Additional Ability through Stun and supplies accessible Daze; Nicole provides grouping and DEF reduction | Budget entry team while premium options are unavailable |
Rina is excellent, not mandatory. Her PEN Ratio remains valuable because Claret can saturate general damage bonuses, and her team support does not depend on ATK scaling. Norma is particularly comfortable because her Chain interactions help preserve Crimson Inscription and manage the Stun setup. Koleda offers a simpler route. Trigger and Nicole can create a competitive alternative if the player manages field time and debuff duration precisely.
When choosing replacements, apply three checks. First, make sure the Additional Ability stays active. Second, ask whether the partner's main buff actually affects DEF-scaled Sharp DMG. Third, keep support animations short enough that Claret can maintain her field loop. A famous premium Support built around ATK may contribute less than an accessible character who provides DEF reduction, PEN, Daze, grouping, or compatible Quick Assists.
Skill Upgrade and Investment Priority
Upgrade the Core Skill whenever its material gate allows because it controls Claret's class mechanics and grants valuable CRIT Rate through Core nodes. Among normal combat skills, prioritize Special Attack first, then Chain Attack and Basic Attack. Special governs entry into Crimson Inscription and the Maim detonations. Chain is central to the Stun route and transformation duration. Basic builds Gash and connects the shortcuts. Assist and Dodge remain useful but can be finished later.
At M0, Claret has the complete loop: DEF scaling, excess-CRIT Laceration, three Gash stacks, Maim, Crimson Inscription, and the advanced Stun route. M1 improves Gash building and Maim output. M2 extends Crimson Inscription and adds Electric RES ignore during her key actions. These are meaningful upgrades, but they improve an existing rotation rather than repairing a broken base kit.
For players choosing between a Mindscape and Crimson Thirst, the signature W-Engine usually solves more of the build at once because it supplies DEF-compatible scaling, CRIT Rate, and specialized damage bonuses. The exception is an account that already owns a strong high-refinement Bloodmarrow Coffer and values the smoother M1 rotation more than the signature's ceiling. Test M0 with Catty Luck or Bloodmarrow Coffer before deciding whether the playstyle deserves more pulls.
Diagnosing a Claret Build That Feels Weak
If Claret survives comfortably but deals poor damage, check initial DEF first. A build sitting below 1,800 may be missing the full Thorned Rose CRIT bonus. Next, check in-combat CRIT rather than the menu number. The second Laceration check cannot happen unless total CRIT exceeds 100%, and a Catty Luck build needs more CRIT from Discs than a Crimson Thirst build.
If the stats look correct but Stun damage is low, inspect Gash preparation. Entering Stun with zero stacks spends the valuable window generating the resource instead of detonating it. If Crimson Inscription expires before hold Special, shorten the partner field time, use Chain Attacks to pause and extend the state, and avoid swapping Claret out mid-animation.
If the team sheet looks expensive but buffs feel ineffective, identify ATK-only effects. Claret needs PEN, DEF reduction, compatible damage bonuses, Daze, grouping, and CRIT support. An ATK buff may be powerful on another DPS yet contribute little to her DEF-based skill multipliers. Finally, remove Energy Regen solutions: Sharpness is its own resource, so field contact, Ultimate timing, and efficient swaps fix the cycle more directly.
Final Build Recommendation
Start with four-piece Thorned Rose, CRIT Rate / PEN Ratio / DEF% main stats, and whichever two-piece set has the best useful substats. Use Puffer Electro with Rina when the PEN plan is strong, Woodpecker Electro when CRIT is short, or Soul Rock while finishing the DEF breakpoint. Reach 1,800 initial DEF before chasing an impressive in-combat CRIT ceiling.
Use Crimson Thirst for the best performance and easiest stat balance, Bloodmarrow Coffer for a CRIT-focused Battle Pass alternative, or Catty Luck for the reliable craftable route. Pair Claret with one short-field Stun partner and a Support whose PEN, DEF reduction, grouping, or compatible buffs affect her actual damage. Learn the normal tap-Maim loop first, then practice entering Stun with three Gash stacks for the six-Maim route.
Claret's build is unusual, but its logic is consistent: DEF creates the damage base, CRIT Rate drives one or two Laceration checks, enhanced Basics create Gash, and Specials convert Gash into Maim. Once those four layers are aligned, the character stops feeling complicated and starts rewarding deliberate resource preparation.
FAQ
What are Claret's best Drive Disc main stats?
Use CRIT Rate on Disc 4, PEN Ratio on Disc 5, and DEF% on Disc 6. Four-piece Thorned Rose is the core set. Puffer Electro, Woodpecker Electro, and Soul Rock are all viable two-piece options depending on the team and substats.
How much DEF does Claret need?
Reach at least 1,800 initial DEF to unlock the full Thorned Rose CRIT Rate bonus. After that threshold, continue improving DEF and CRIT Rate together. Developed endgame builds can move above 2,300 DEF, but exact totals vary by W-Engine and team buffs.
Why does Claret want more than 100% CRIT Rate?
After Sharp DMG passes its first critical check, CRIT Rate above 100% becomes the chance for a second Laceration check. At 140%, that second check has a 40% chance; at 200%, it becomes guaranteed. Count combat buffs before deciding how much the Disc sheet needs.
Does Energy Regen help Claret recover Sharpness?
No. Sharpness replaces her normal Energy resource for the Armorer loop and is not restored by Energy Regen. Manage it through Claret's field actions, Ultimate timing, and efficient rotation rather than an Energy Regen Disc.
Does Claret need Rina?
No. Rina is one of her strongest Supports because PEN Ratio and DEF-compatible buffs fit Claret well, but Koleda, Norma, Trigger, Anby, and Nicole can form other workable shells. Keep Claret's Additional Ability active with a Stun, Armorer, or Electric teammate.
Where can players top up for optional Claret pulls?
Players who decide to prepare in-game currency for optional Claret or W-Engine Signal Searches can use Topuplist as a game recharge platform and open the Zenless Zone Zero recharge page. Claret is fully functional at M0, so test the base rotation before funding additional copies.
