

Genshin Impact 7.2 Mitya Build: Weapons, Teams and Constellations
Mitya arrived in Genshin Impact 7.2 on November 4. The new 5-star Electro Catalyst user can either lead a Stellar-Conduct team on-field or provide Electro application and support from off-field. His stronger reason to pull, however, is his on-field damage, with C1 and C2 offering particularly meaningful upgrades.
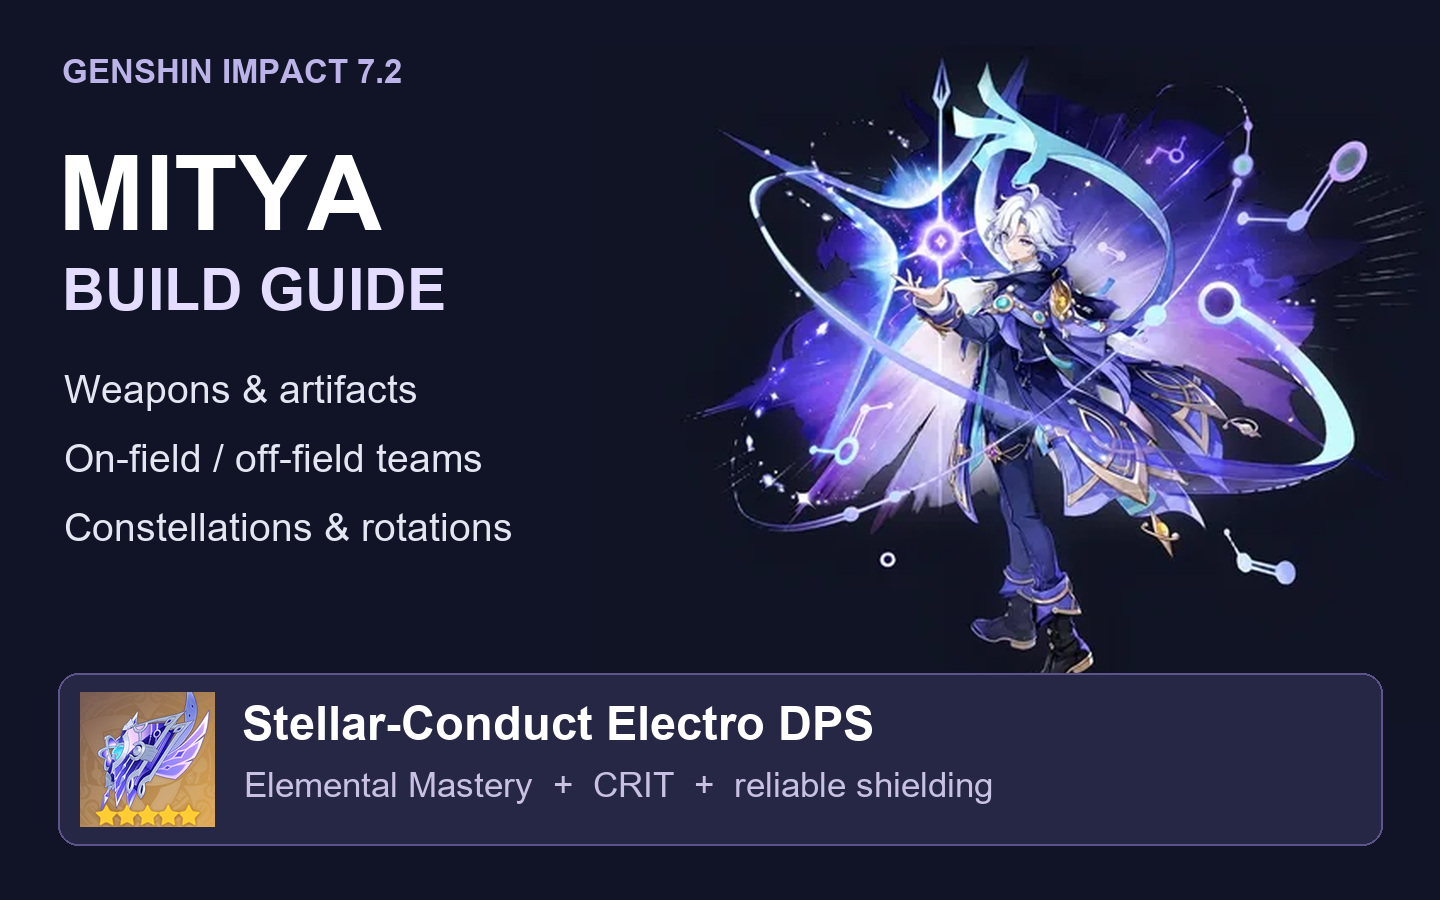
This guide covers his current weapon options, talent priorities, artifacts, key Constellations and practical team rotations. Relative damage figures are early estimates; team composition, artifact quality, refinement and buff uptime can change the result.
Mitya's Role: On-Field DPS or Off-Field Support?
Holding his Elemental Skill creates an Overloaded Detection Core for on-field play. Mitya then consumes Gradient Beacons with his special Charged Attack, Gradient Detonation, to deal Stellar-Conduct damage. Tapping the Skill instead creates a Steady State Detection Core, allowing him to apply Electro and contribute support while another character takes the field.
His on-field damage is promising, and the basic attack sequence is relatively straightforward. Off-field Mitya gives up much of that personal damage in exchange for Electro application and team utility. A future teammate with strong, short bursts of damage could potentially improve his quickswap teams, but that is a possibility rather than a reason to assume a future upgrade.
Best Weapons and Catalyst Alternatives
Starsealed Edict: His Signature Weapon
Starsealed Edict is the first choice for personal damage. At Level 90 and R1, it has 542 Base ATK and 88.2% CRIT DMG. Including its passive, it provides 112.2% general CRIT DMG, up to 120 Elemental Mastery, and another 36% CRIT DMG specifically for Stellar-Conduct at full stacks.
The appeal is its concentrated EM and CRIT stats. Even so, Mitya has usable alternatives, so owning his signature is not a prerequisite for building him.
Other 5-Star Catalysts You May Already Own
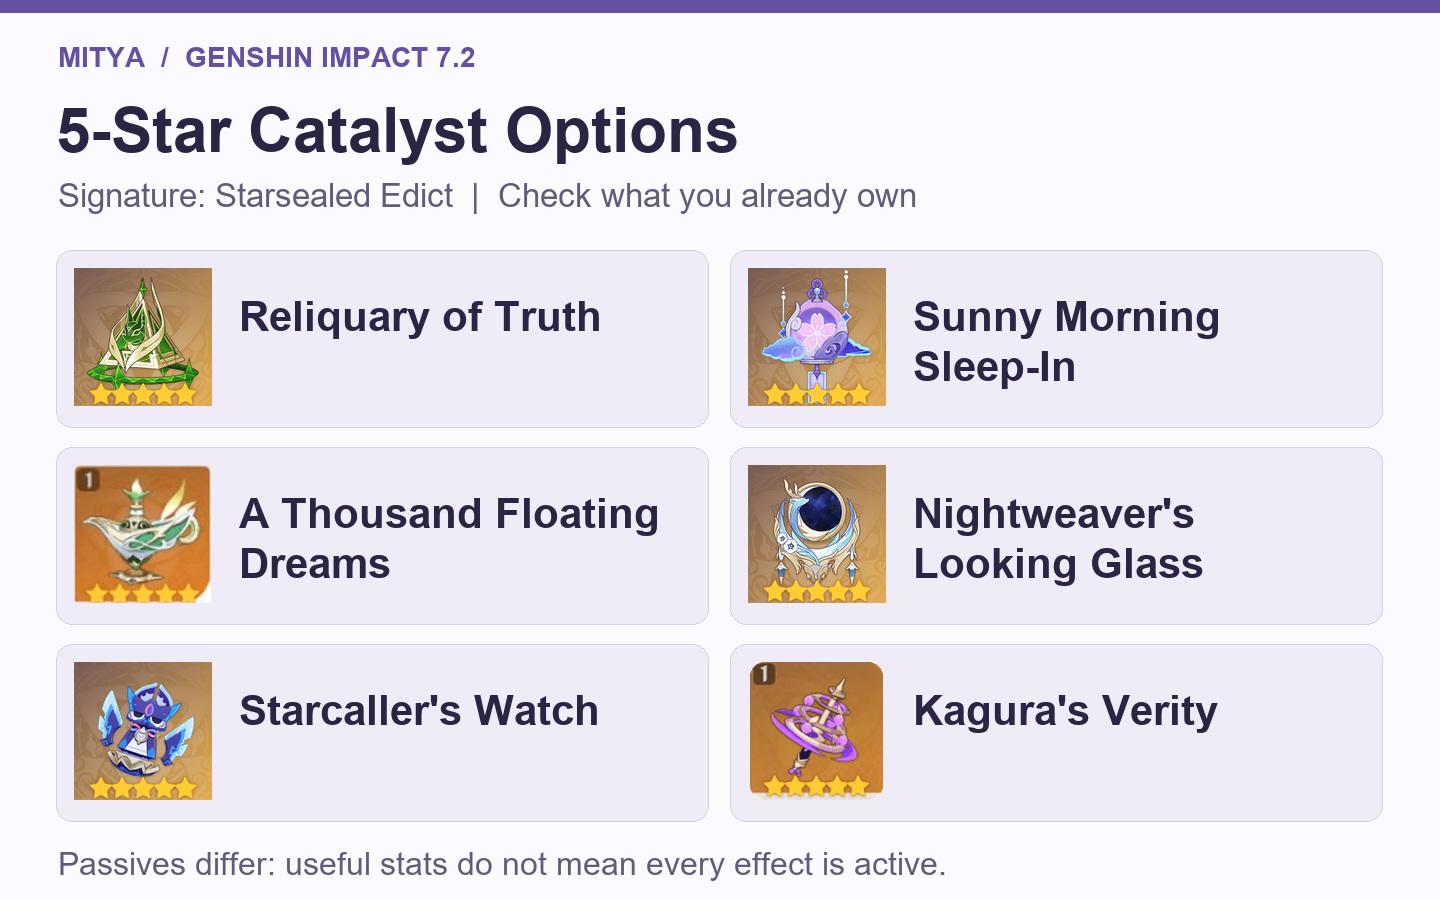
Useful EM or CRIT options include Reliquary of Truth, Sunny Morning Sleep-In, A Thousand Floating Dreams, Nightweaver's Looking Glass, Starcaller's Watch and Kagura's Verity. Check your existing weapons before spending on another Catalyst.
Their passives are not interchangeable. Mitya cannot trigger Sunny Morning Sleep-In's Swirl bonus, although its other EM effects remain useful. He also cannot activate Starcaller's Watch's shield-creation buff simply by receiving Valeriy's shield, and Reliquary of Truth's Lunar-Bloom effects do not automatically apply to a Stellar-Conduct team. Judge these weapons by the stats and effects he can actually use.
Initial comparisons place selected alternatives in the roughly 80–90% of R1 Starsealed Edict range when comparing R1 5-star weapons or highly refined 4-star weapons under favorable conditions. This is a broad comparison range, rather than one shared result for every weapon above.
4-Star Options and Lower-Cost Fallbacks
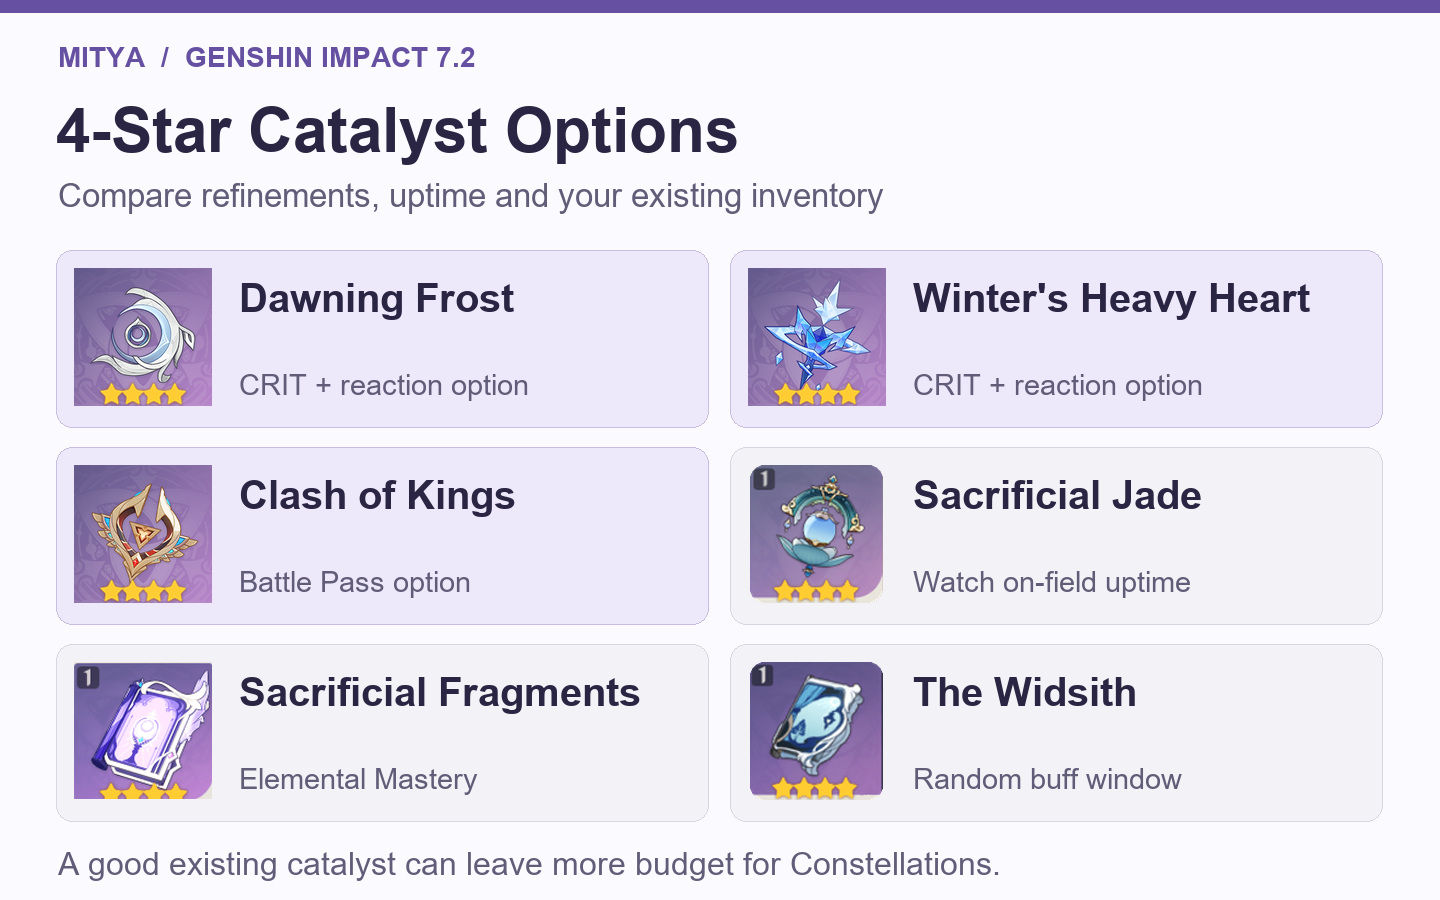
Dawning Frost, Winter's Heavy Heart and Clash of Kings are the first 4-star options to check. Early estimates put their R1 performance around 75% of his R1 signature, with stronger performance at higher refinements. Clash of Kings comes from the Battle Pass; the other two depend on limited weapon availability.
Sacrificial Jade is another option, estimated at around 76% at R5 in a suitable rotation. Its off-field activation and on-field duration limit matter, so prolonged field time can reduce its value. Acquiring multiple Battle Pass copies specifically for Mitya is difficult to justify if you already have a workable alternative.
Sacrificial Fragments is a straightforward EM fallback, estimated around 70% of the signature in the comparison. The Widsith can perform well when it rolls its EM buff, but the random effect and limited buff window make its damage less consistent.
 Genshin Impact




Talent Priority
On-field Mitya should prioritize his Normal Attack talent, Chain Reaction. Gradient Detonation's scaling is contained in that talent, even though the Beacon-consuming damage is treated as Stellar-Conduct reaction damage. For an off-field build, prioritize his Elemental Skill, Principle: Variable Detection, instead.
His Elemental Burst, Analysis: Gradient Theory, deals a separate hit of AoE Electro damage and creates three Gradient Beacons. Its setup function is important in either role. Level 6 is a reasonable starting point when conserving talent materials; invest further after the talent that drives your chosen playstyle.
Artifacts: EM Main Stats and Flexible Sets
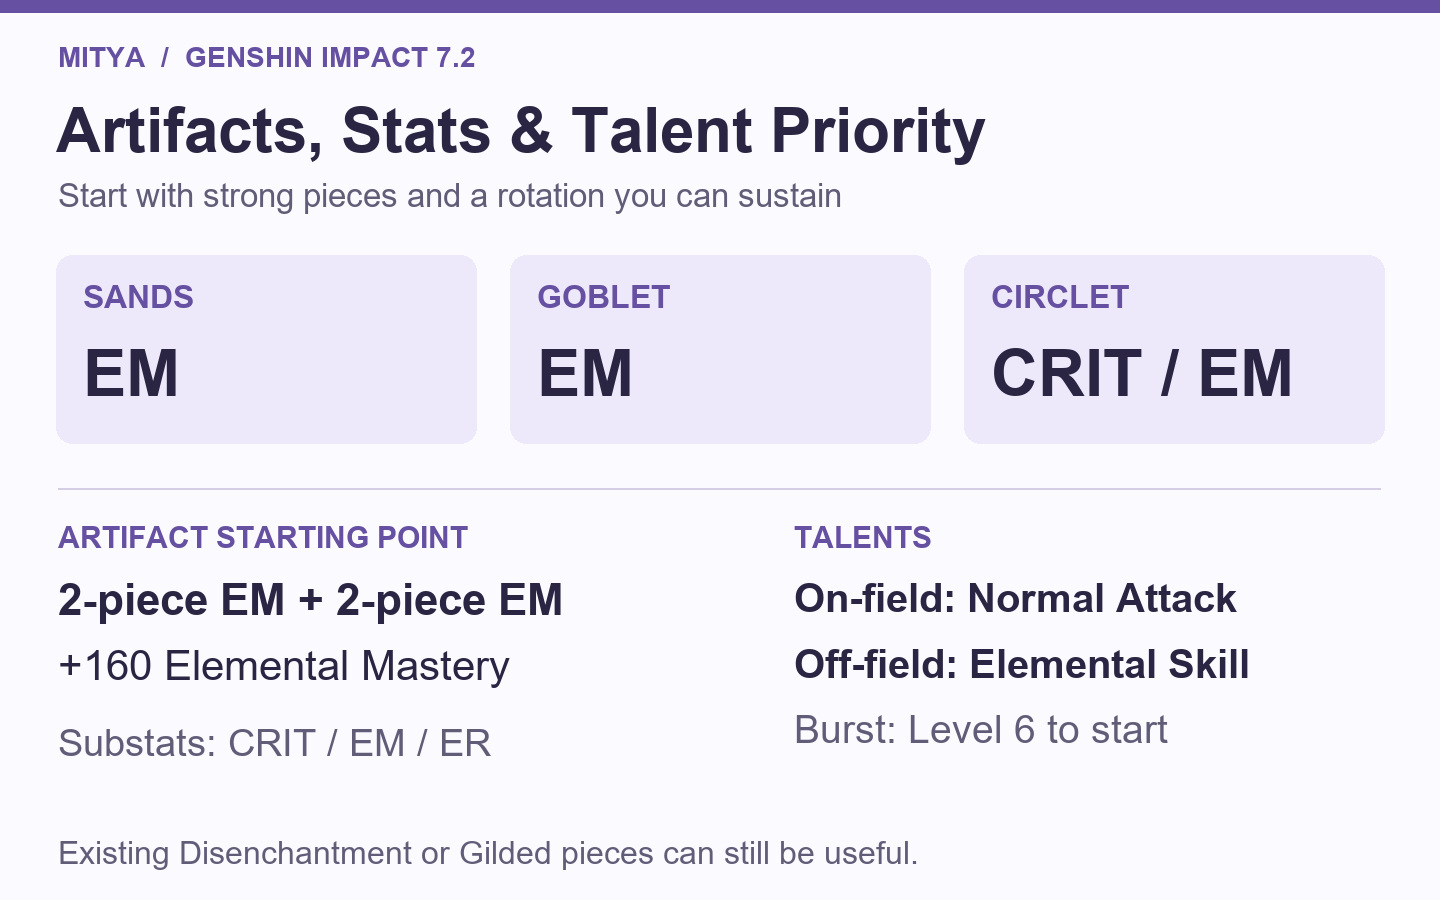
Mitya benefits heavily from Elemental Mastery. A practical starting point is two 2-piece EM sets, providing 160 EM while letting you use your strongest individual pieces. Disenchantment in Deep Shadow remains useful if you already own a good EM-focused set, while Gilded Dreams is another workable option.
The ATK-focused part of Disenchantment is less valuable to him than EM. Early equal-substat comparisons put its advantage at about four effective substat rolls over an EM 2+2 setup, or about three over Gilded Dreams in a double-Electro team and one in a single-Electro team. Those margins depend on the build, so they are not a reason to discard better existing pieces or force a new farming project.
Sands: Elemental Mastery.
Goblet: Elemental Mastery.
Circlet: CRIT Rate, CRIT DMG or Elemental Mastery, depending on your overall stats.
Substats: CRIT, Elemental Mastery and enough Energy Recharge to maintain the rotation.
Account for Mitya's in-combat CRIT Rate effects when balancing your artifacts, especially with a CRIT Rate weapon or Disenchantment. Off-field play may also need more Energy Recharge because he spends less time catching particles.
Key Constellations and Further Investment
C1: Better Setup, Energy and Beacon Capacity
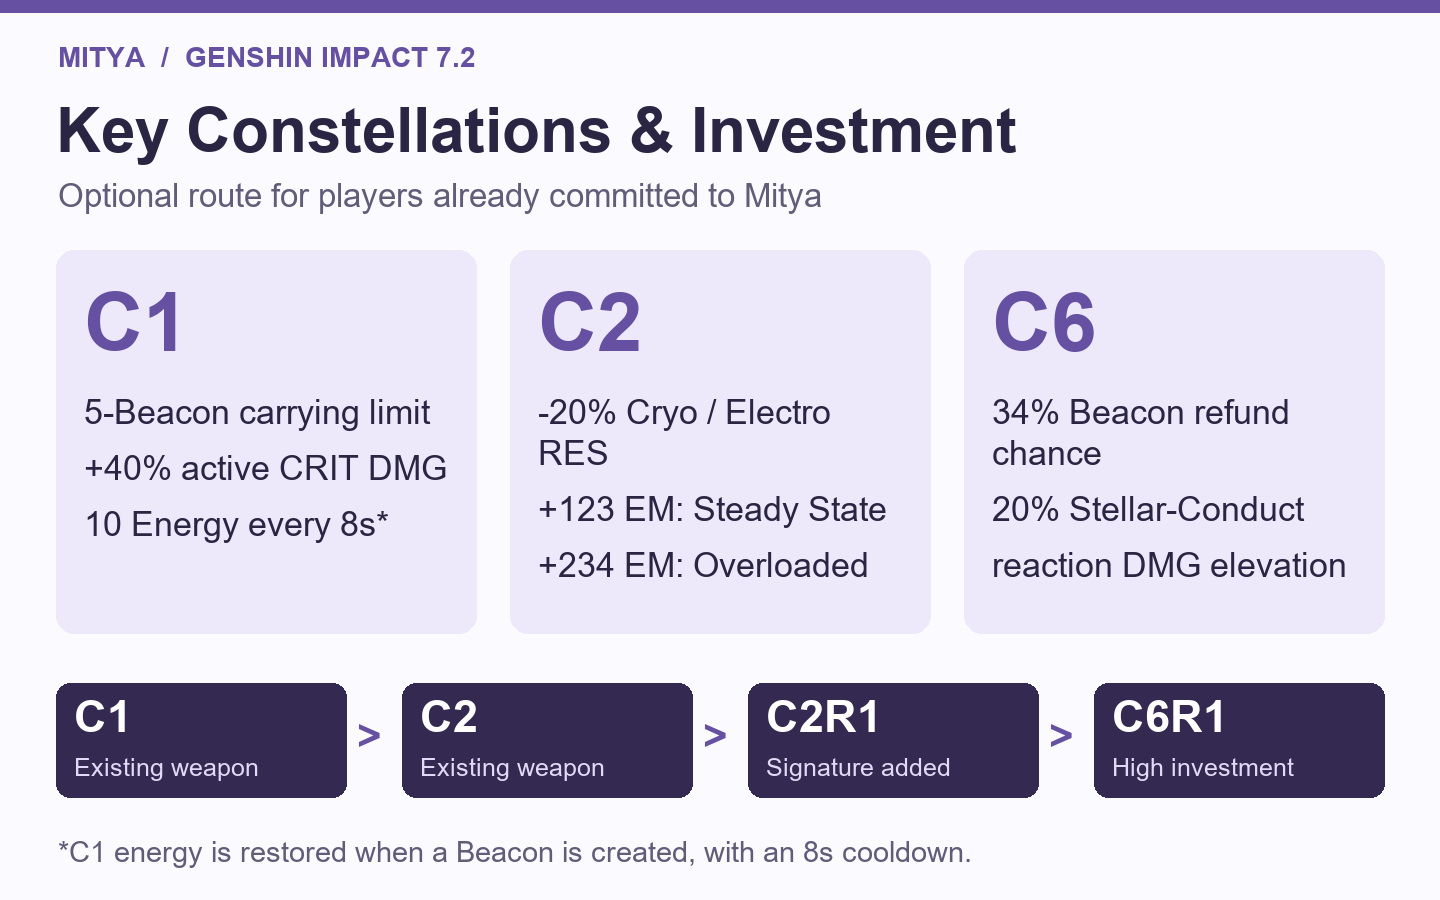
C1 raises his Beacon carrying limit from four to five, creates an additional Beacon when he uses his Skill, and grants the active character 40% CRIT DMG while the Detection Core is present. Creating a Beacon also restores 10 Energy to Mitya, with an eight-second cooldown.
These changes improve his setup and energy flow while giving him more room to fit his attacks into support buff windows. The additional Skill-generated Beacon also makes it easier to establish his mobile Polestar Field immediately. The early individual-upgrade estimate is around 30%.
C2: Cryo and Electro RES Reduction, Plus More EM
While the Detection Core is present, C2 lowers the Cryo and Electro RES of enemies inside the Polestar Field by 20%. It also provides 123 EM to nearby party members in Steady State, or 234 EM to your active character in Overloaded mode.
This combines personal damage with stronger team support, making C2 an important stopping point for players committed to Mitya. The early individual-upgrade estimate is around 40%.
C6: A High-Investment, Randomness-Based Damage Upgrade
In Steady State, C6 makes the Core deal 115% of its original damage. In Overloaded mode, consuming a Beacon has a 34% chance to create a new one. It also gives nearby party members 20% Stellar-Conduct reaction damage elevation.
The refund can extend a Charged Attack sequence, but it does not guarantee a fixed number of explosions or an endless chain. The early individual-upgrade estimate is around 70%. The C1, C2 and C6 percentages describe separate upgrade comparisons, not three bonuses to add together.
Constellations or Signature Weapon First?
For a player already planning further investment, the suggested route is C1 with an existing weapon → C2 with an existing weapon → C2R1 → C6R1. Here, R1 means one copy of Starsealed Edict at Refinement Rank 1. C6R1 is an optional high-investment endpoint, not a baseline requirement.
The reasoning is that C1 and C2 add substantial utility as well as damage, while his signature has usable substitutes. The paired 5-star weapon in this banner is Furina's Splendor of Tranquil Waters; if you have little use for it, that makes prioritizing early Mitya Constellations more appealing. Decide on a stopping point before considering a Genshin Impact top-up.
Rotations: Off-Field Setup and On-Field Sequence
In the notation below, E means Elemental Skill, Q means Elemental Burst, and CA means Charged Attack. On mobile, hold the attack button to perform the Charged Attack.
Off-field: tap E → Q → switch to your main damage dealer.
On-field example: Mitya + Odette + Valeriy + Sucrose.
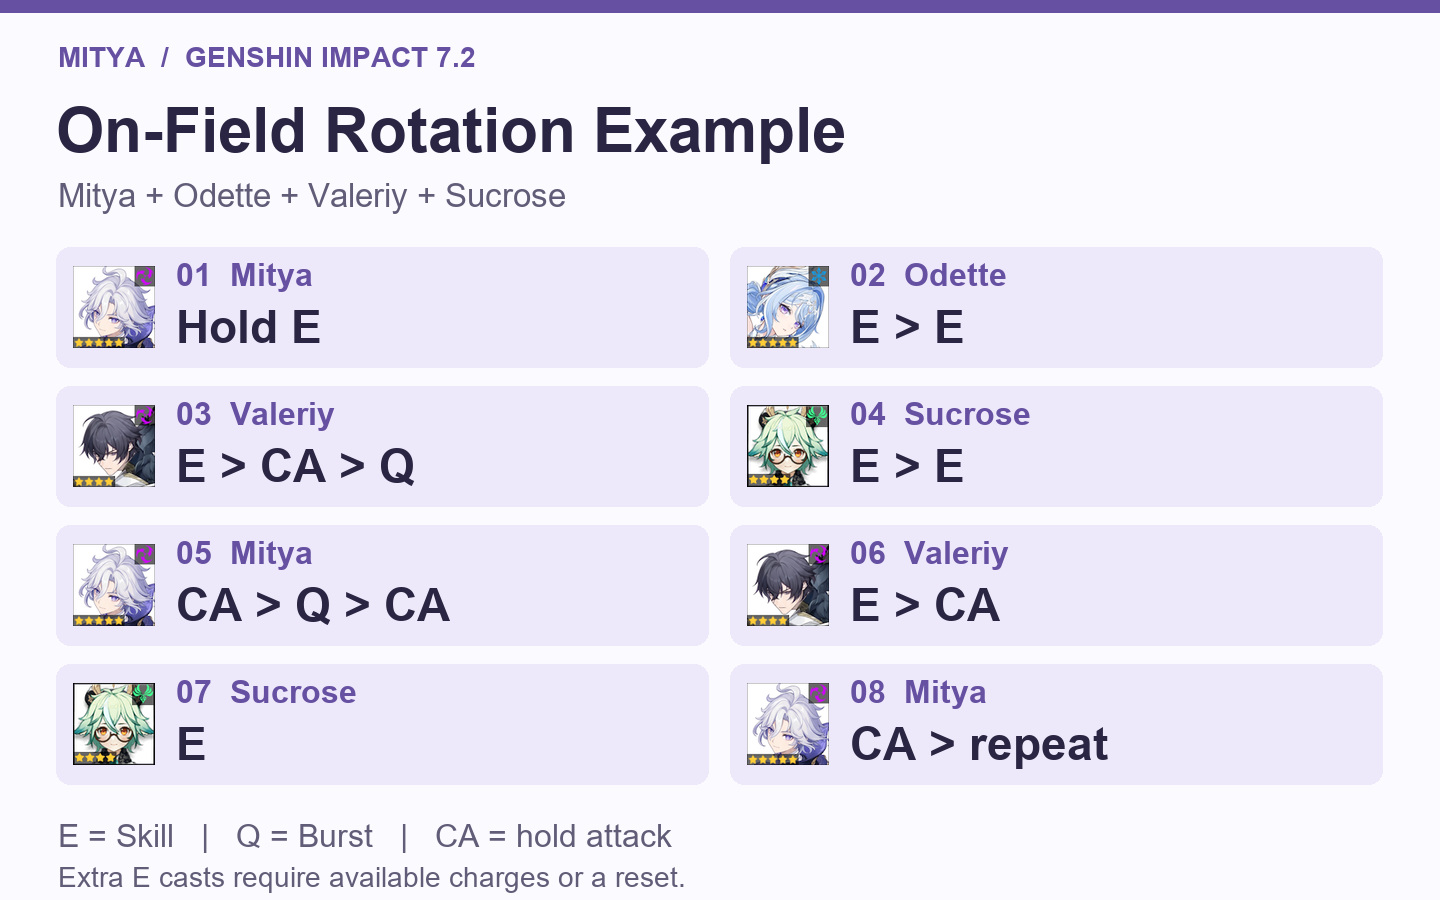
Mitya: hold E. Switch to Odette and use E twice.
Valeriy: E → CA → Q. Switch to Sucrose and use E twice.
Mitya: CA → Q → CA.
Refresh Valeriy with E → CA, then use Sucrose's E. Return to Mitya for another CA and continue the support cycle.
The repeated E casts assume the relevant charges, cooldowns or resets are available. For example, Sucrose's extra Skill uses depend on her Constellation and/or Sacrificial Fragments setup. If you cannot repeat a Skill at that point, use the available cast and adjust the cycle. Refresh support buffs and shielding before Mitya spends his next set of Beacons.
Recommended Stellar-Conduct Teams
On-Field Mitya
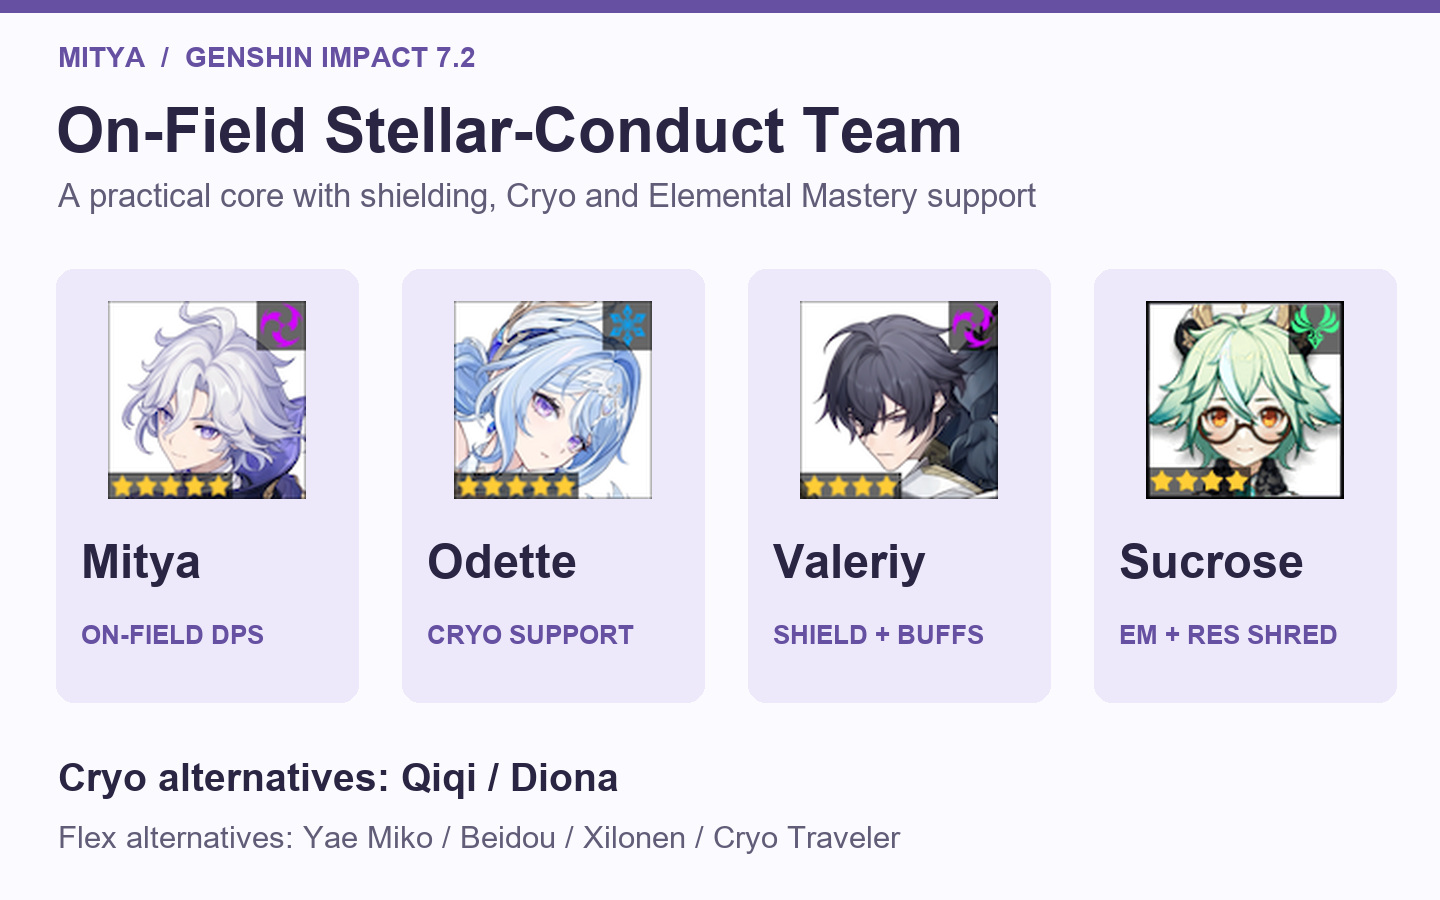
Mitya + Odette / Qiqi / Diona + Valeriy + Sucrose / Yae Miko / Beidou / Xilonen / Cryo Traveler
Odette is the preferred Cryo support in this setup. Qiqi or Diona can cover the Cryo and sustain slot if needed, although their support contribution is different.
Valeriy is particularly well matched to Mitya: his shield helps protect the continuous Beacon-consuming attack sequence, and he adds offensive support. Reliable shielding is strongly recommended for comfortable on-field play.
Sucrose is a strong fourth-slot choice thanks to EM sharing and Viridescent Venerer RES reduction. Mitya can leave the field to refresh her effects between attack windows. Yae Miko, Beidou, Xilonen or Cryo Traveler are alternatives depending on your roster, energy needs and existing sustain.
Off-Field Mitya
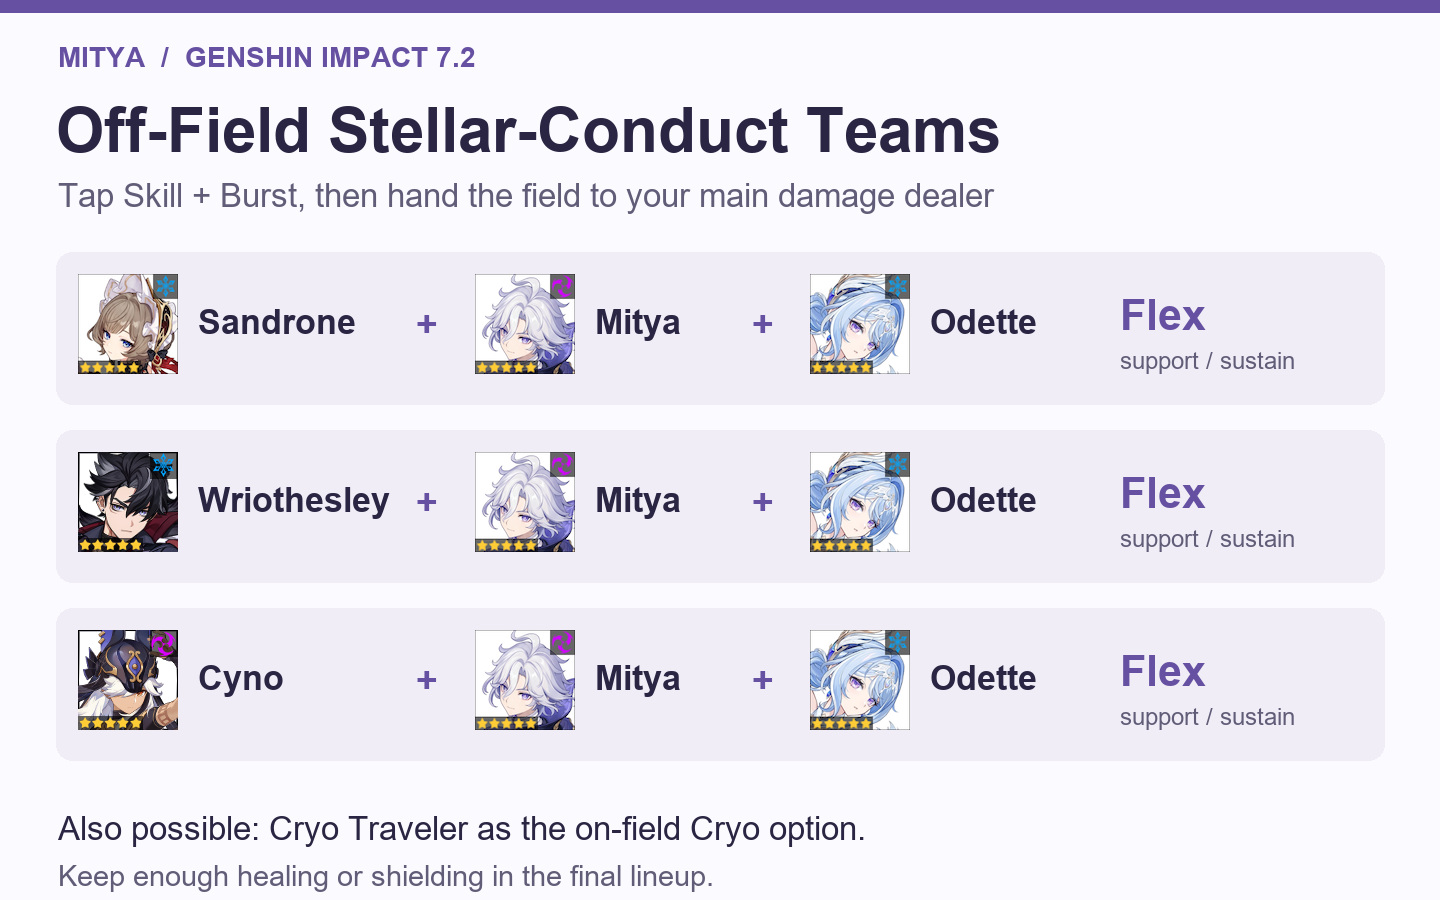
His off-field role overlaps with Yae Miko, providing Electro application alongside a main damage dealer. Examples include:
Sandrone / Cryo Traveler + Mitya + Odette + Nicole / Xilonen / Vodyanitsa / Alyosha / Qiqi.
Wriothesley + Mitya + Odette + Nicole / Xilonen.
Cyno + Mitya + Odette + Valeriy / Alyosha / Qiqi / Xilonen / Diona.
These are alternative lineups, with one character selected for each slot. Keep enough healing or shielding in the final team. C0 Mitya is broadly an alternative to an invested off-field Electro option such as C1 Yae Miko, rather than a clear upgrade for every account. If that role is already covered, his on-field playstyle is the stronger reason to build or pull him.
Is Mitya Worth Building?
Mitya can play both roles, but this build favors him as an on-field Electro Stellar-Conduct DPS. Start with a suitable existing Catalyst, EM-focused artifacts, the correct talent priority and a team that protects his Charged Attacks. Players missing this type of carry can consider him; those planning further investment should weigh C1 and C2 before chasing the signature weapon.