


Once Human Version 3.0.2 Territory Build Guide: Snap-Point Switching, Presets, and Base Design Tips
Once Human Version 3.0.2 adds territory construction snap-point switching, allowing PC players to cycle points with Shift plus the mouse wheel and mobile players to use a dedicated switch button. This guide explains how to use the feature, repair awkward connections, build repeatable modules, preserve structural support, and combine the new workflow with blueprints and appearance presets without rebuilding an entire base blindly.
Once Human Version 3.0.2 changes one of territory construction's most frustrating moments: a building piece finding a valid connection, but choosing the wrong snap point. The update lets players switch among available connection points while building walls, ceilings, roofs, stairs, columns, and related structures. On PC, the announced control is Shift plus the mouse wheel. On mobile, a dedicated switch-snap-point button appears in Build mode.
This is a quality-of-life feature rather than a new building material, but it can change how ambitious bases are planned. Players gain more control over alignment, mirrored sections, roof transitions, stair placement, and compact utility rooms. The feature also reduces the need to rotate a piece repeatedly while hoping the placement system selects the intended anchor.
The best results still require structural planning. Snap-point switching does not remove territory limits, support rules, collision, uneven terrain, or neighboring objects. It gives builders a better way to choose among valid anchors. This guide explains how to turn that control into a reliable workflow.
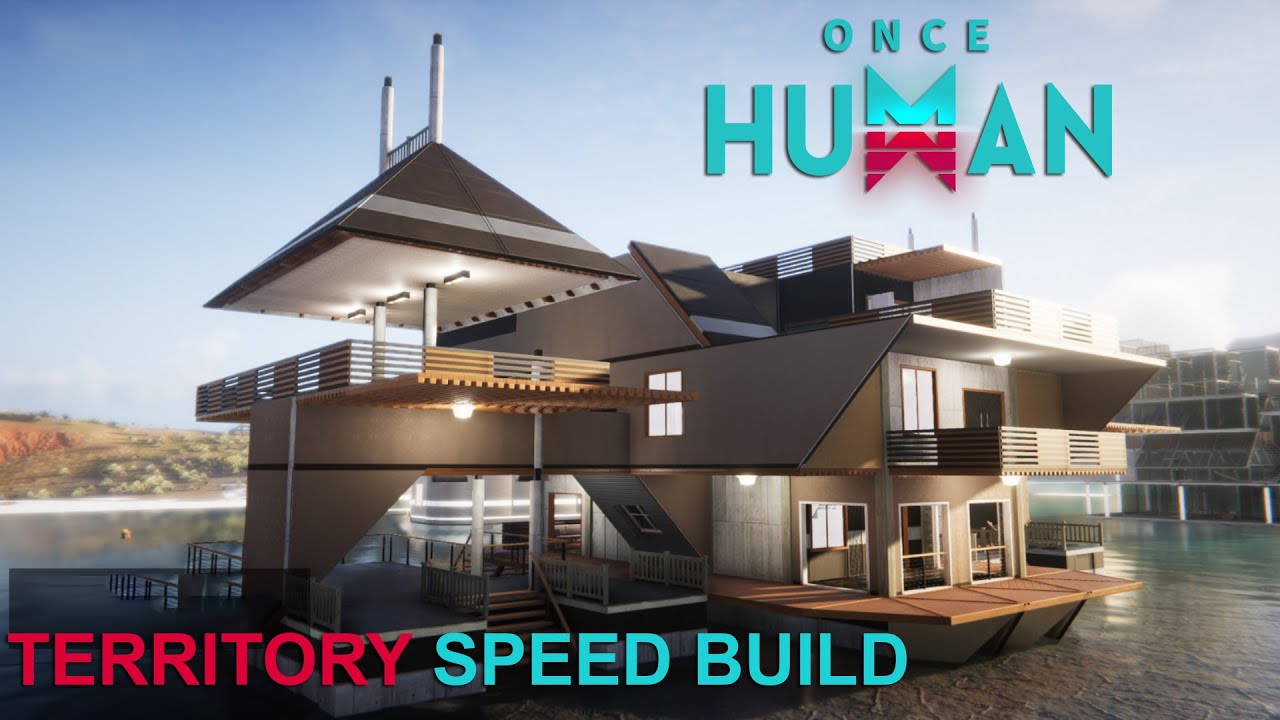
What Snap-Point Switching Actually Does
When a selected building piece is close to several compatible connection points, the game can identify more than one valid anchor. Before Version 3.0.2, builders often had to move the camera, rotate the object, step away, or temporarily remove nearby pieces to make the desired point active.
Snap-point switching lets the player cycle between available points without abandoning the placement. It is most useful where several edges meet, such as a wall beside a column, a ceiling above two rooms, stairs near a foundation corner, or a roof intersection.
The feature does not create an invalid connection. If a piece collides with terrain, lacks support, exceeds territory rules, or uses an incompatible surface, switching points may not solve the problem. Read the placement warning before assuming the new control is broken.
Think of it as anchor selection, not unrestricted placement.
Controls on PC and Mobile
On PC, hold Shift and use the mouse wheel while the placement preview detects multiple snap points. Cycle slowly and watch the highlighted connection or ghost position change.
On mobile, use the on-screen switch-snap-point control shown during compatible placement. The exact icon position can depend on interface layout, so check the Build mode controls after updating.
If nothing changes, move the preview slightly closer to the structure. The system needs to detect more than one compatible point. Also check whether camera zoom or another keybind interferes with the input.
Do not scroll rapidly. A complex joint may offer several points, and moving too quickly makes it easy to pass the intended anchor.
Update and Settings Checklist
Before modifying a valuable territory, verify the client is running Version 3.0.2 or later. Restart after the update and enter Build mode in a low-risk area.
Check | Expected result | If it fails |
|---|---|---|
Client version | Version 3.0.2 or later | Complete update and restart |
Compatible preview | Ghost piece detects a structure | Move closer or select matching piece |
PC input | Shift plus mouse wheel cycles anchors | Review bindings and mouse settings |
Mobile input | Switch button appears | Reset interface or reopen Build mode |
Valid placement | Preview clears placement restrictions | Resolve collision, support, or limits |
Test with a simple wall and ceiling before editing the main base. This confirms the control and makes the visual change easier to recognize.
Build a Small Test Rig
Create a temporary foundation with two walls, a column, one ceiling, and a stair. This test rig exposes several common snap situations without risking an established structure.
Select another wall and approach the corner. Cycle snap points and observe whether the wall changes edge or orientation. Repeat with a ceiling near the two walls, then test a stair near the foundation and ceiling.
The goal is to learn how the preview communicates the active point. Some changes are obvious; others shift only a small distance. Rotate the camera around the joint before confirming.
Dismantle the test rig after learning the controls, or save it as a reference module if the current server rules and blueprint system allow it.
Fixing Wall Alignment
Walls create frequent competition between foundation edges, neighboring walls, columns, and upper floors. When a wall selects the wrong edge, keep the preview active and cycle points before rotating the entire building piece.
Use a consistent exterior reference. Decide whether walls align to the outside edge, centerline, or a column grid. Mixing references produces uneven rooms even when every individual placement is valid.
At corners, inspect both sides for gaps or overlap. A wall can appear aligned from the interior while extending incorrectly outside. Walk around the structure before confirming a repeated pattern.
For long corridors, place a reference wall at each end and test the middle connection. This reveals accumulated alignment problems before dozens of pieces are installed.
Ceiling and Floor Connections
Ceilings often detect multiple walls and beams beneath them. Snap-point switching can help select the intended room edge, especially in compact multi-level designs.
Build from a stable structural line rather than filling random gaps. Complete one row, check support and alignment, then extend the next row. This makes it easier to identify which anchor produced an error.
If a ceiling refuses to place, inspect support and collision. Switching anchors cannot fix a structure that exceeds support conditions. Add a temporary column or wall, place the ceiling, and then determine whether the temporary support can be removed safely.
Avoid confirming several pieces from one camera angle. Look from above and below so that a ceiling intended for one floor does not attach to an adjacent height.
Roof Transitions and Mirrored Designs
Roof intersections are visually sensitive. A small anchor difference can create uneven ridges, incorrect overhangs, or pieces that face the wrong direction.
Establish the central ridge or outer edge first. Use snap-point switching to mirror the opposite side, checking rotation after every anchor change. The active snap point and the roof piece's orientation are separate decisions.
For complex roofs, build one complete module before copying the pattern. Record the order: wall, support, ceiling, first roof piece, mirrored roof piece, and transition. A repeatable sequence produces more consistent results than placing decorative sections independently.
Rain cover and interior appearance should both be checked. A clean exterior can hide clipping inside an attic or upper room.
Stairs, Landings, and Vertical Circulation
Stairs often compete for foundation, floor, wall, and landing anchors. Decide the required top landing and bottom approach before placing the stair.
Start from the destination floor when possible. Position a landing, then cycle the stair's snap points until the top aligns cleanly. Confirm that the bottom does not block a doorway, storage path, or defensive route.
Test movement immediately after placement. Walk and sprint both directions. A visually valid stair can still create an awkward step, low ceiling, or collision with nearby furniture.
In multi-floor bases, use the same stair module repeatedly. Standardized landings make blueprint sections and later renovations easier.
Columns and Structural Grids
Columns provide a visual and structural reference for larger builds. Establish a grid before adding decorative walls and roofs.
Use foundations or floor tiles to define spacing, then place columns on the chosen reference points. When several corners are close together, cycle anchors and inspect the base of the column from above.
A consistent grid makes later ceiling, wall, and roof placement more predictable. It also helps identify an accidental offset: if one column does not line up with the row, repair it before building above.
Do not use columns only as decoration until the structural layout is stable. Removing or changing a support later may affect connected pieces.
Building on Uneven Terrain
Snap-point control cannot flatten terrain. Before starting a large territory, inspect slopes, rocks, vegetation, water edges, and object collision.
Create a foundation reference at the highest critical point. Extending from a low point can cause the opposite side to collide with rising ground. Test the full footprint with a temporary line of foundations before committing resources and decoration.
Use height transitions deliberately. A split-level base can work better than forcing one flat platform across a steep slope. Snap-point switching helps connect modules, but the modules still need legal placement.
Leave access around important facilities. A technically compact design can become difficult to use when terrain blocks one side.
Modular Rooms and Repeatable Sections
The new control is especially useful for modules: storage rooms, crafting bays, power rooms, bedrooms, garages, and defensive entrances built from repeatable dimensions.
Choose a standard foundation size and connection edge. Build one module completely, verify movement and facility access, then reproduce it. Snap-point switching can select the correct edge when attaching the next room.
A module should have a clear connection zone without furniture or decorations that interfere with placement. Add detailed decoration after the structural modules are joined.
Record utility connections such as power, water, and access routes. A visually repeated room may still require different functional placement.
Blueprints and Preset Workflows
Blueprints can preserve a successful structure, but they can also reproduce a hidden alignment mistake. Audit every joint before saving.
Create a clean version without temporary supports or test pieces. Confirm that doors open, stairs work, facilities remain accessible, and territory limits are acceptable.
Version 3.0.2 also expands appearance preset data sharing, but character appearance presets are separate from territory blueprints. Do not confuse the two systems. The update improves several forms of customization, yet each has its own menu and limits.
When importing or sharing any preset, verify the current gender, slot limit, ownership requirements, and server rules displayed in the client.
Renovating an Existing Territory
Do not dismantle an entire base simply because snap-point switching is available. Start with one problem area, such as a stairwell, roof corner, or misaligned wall.
Move valuable facilities and storage away from the renovation zone. Take screenshots of utility connections and structural order. Remove the smallest number of pieces needed to expose the joint.
Rebuild the reference piece first, then cycle anchors for the connecting objects. Test the repaired section before restoring decoration.
Large renovations should be divided into phases. Keeping part of the base functional reduces the risk of losing access to crafting, storage, power, or defense.
Common Snap-Point Problems
The Point Does Not Change
The preview may detect only one valid anchor. Move closer to a joint with multiple compatible edges, confirm the selected piece type, and try another camera angle.
The Piece Changes Position but Remains Red
Anchor selection succeeded, but another restriction remains. Check collision, structural support, territory bounds, height, and object limits.
The Wrong Orientation Appears
Cycling points and rotating the piece are separate actions. Select the correct anchor first, then rotate to the required direction.
The Mobile Button Is Missing
Confirm the update, reopen Build mode, and inspect interface customization. The button may appear only when multiple snap points are detected.
A Renovation Breaks Connected Pieces
Restore support and rebuild from a stable reference. Avoid removing several structural pieces simultaneously without understanding their connections.
Territory Resource Planning
A planning session saves more material than repeated demolition. Estimate foundations, walls, ceilings, roofs, stairs, and columns for one module, then multiply by the number of repeated sections.
Keep a reserve for corrections and utility changes. A design that consumes every material before power, storage, or defense is installed is not complete.
Players purchasing supported in-game content can review Topuplist and use the Once Human top-up page. Confirm the account, server, platform, product, and order information before payment. Never share a password or one-time security code.
Cosmetic purchases should be planned after confirming that the territory structure supports the intended theme. Decoration cannot repair an inaccessible or unstable layout.
Final Build Workflow
Use Version 3.0.2 snap-point switching as part of a disciplined sequence: update the client, test the control, establish a structural grid, complete one module, inspect every angle, and save only the clean result.
Cycle anchors before dismantling nearby structures. Separate anchor problems from collision and support problems. Standardize walls, stairs, columns, and roof transitions before adding decoration.
The feature is small, but it removes friction from precise construction. Builders who combine it with reference lines, modular planning, and staged renovation will gain more than players who simply scroll through points without a design.
FAQ
What changed in Once Human Version 3.0.2 building?
The update adds territory construction snap-point switching, allowing players to cycle among compatible connection points while placing supported structures.
What is the PC control?
The announced PC control is Shift plus the mouse wheel while a building preview detects multiple snap points.
How does it work on mobile?
Mobile uses a dedicated switch-snap-point button in Build mode when compatible points are available.
Does switching snap points ignore collision or support rules?
No. It selects among valid anchors but does not remove terrain collision, structural support, territory boundaries, or object limits.
Which pieces benefit most?
Walls, ceilings, roofs, stairs, columns, and complex joints with several nearby compatible edges gain the most practical value.
Should I rebuild my entire base?
No. Test the feature and renovate one problem area at a time. Preserve utility access and structural references.
Are appearance presets the same as territory blueprints?
No. Appearance presets belong to character customization, while territory blueprints preserve building layouts. Version 3.0.2 updates both customization areas in different ways.
