


Delta Force H1000 Boss Guide: AZ3 Classified Mode, Loadout & Loot
H1000 spawns in AZ3 Classified mode near the core reactor. Clear weaker variants first, bring anti-radiation gear, and earn gold-tier loot that respawns every 10 minutes.
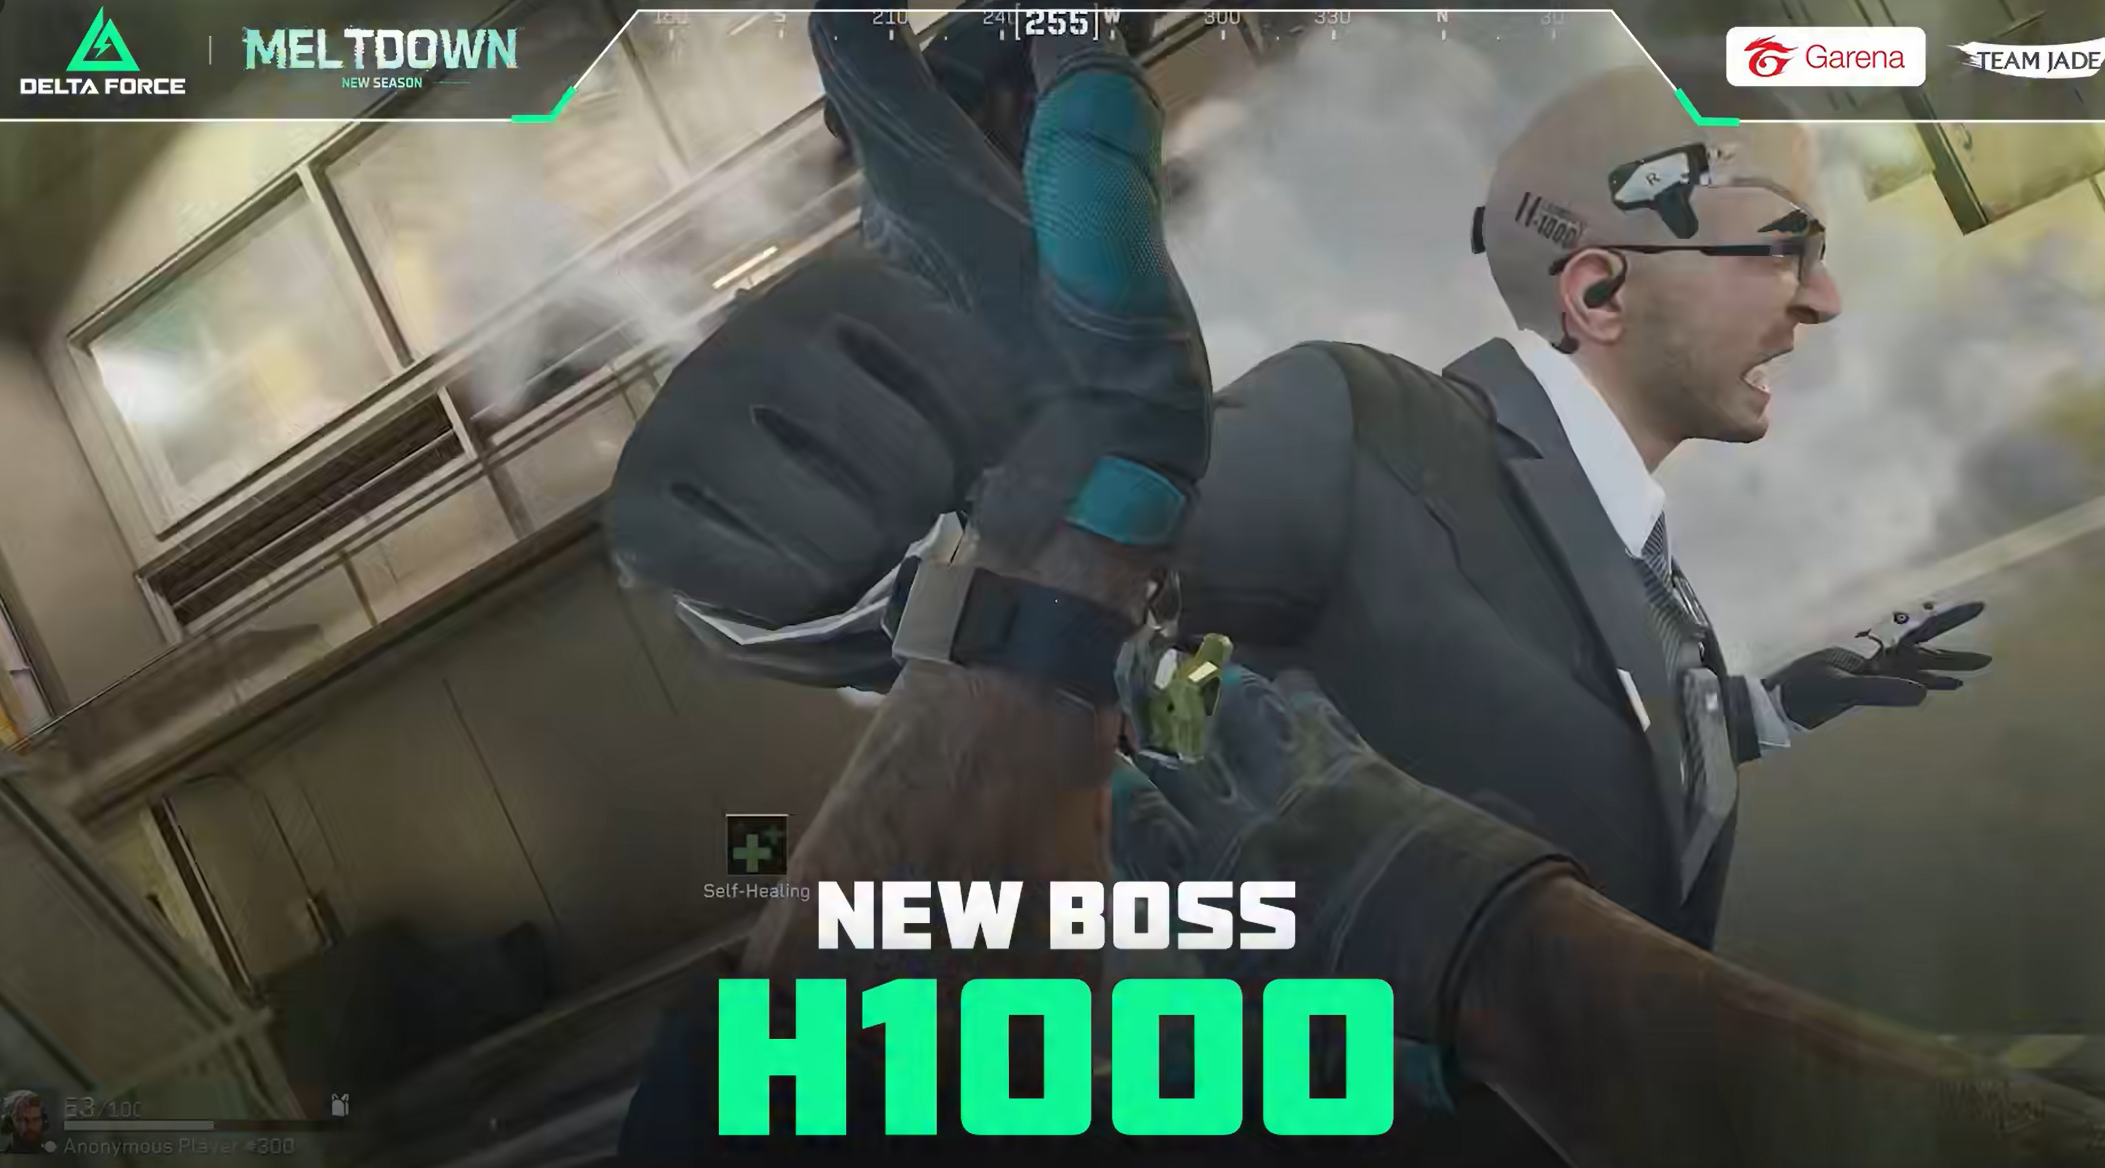
H1000 is the new boss type introduced in Delta Force Season 10 "Meltdown," and it is the centerpiece fight of the AZ3 Nuclear Power Plant. Season 10 launched on June 30, 2026 across PC, mobile, and console, and H1000 sits at the bottom of AZ3 near the core reactor, behind both the radiation mechanic and a wave of weaker enemies. The official Delta Force site lists H1000 among the season's new content, and the fight details below come from the announced design rather than guesswork.
This guide covers where H1000 spawns, how the fight is structured, the radiation prep you cannot skip, the loadout and squad setup that works, the tactics that keep a four-stack alive, and the loot payoff that makes the risk worth it. Because the boss lives inside an active radiation zone, the H1000 fight is as much about exposure management as it is about damage.
What H1000 Is and Where It Spawns
A Neural Device Agent in AZ3
H1000 is described as a Neural Device Agent — fast, lethal, and hard to predict, with a sci-fi, almost machine-like threat profile. It is not a single static target you walk up to; the design leans into a mobile, punishing enemy that rewards teams that control space and communication. The official announcement frames H1000 as the deep-end challenge of AZ3, which is why most squads treat it as a planned raid rather than a random encounter.
The machine-like framing is not just flavor. H1000 behaves less like a bullet-sponge mini-boss and more like a hunter: it repositions, punishes splits, and pressures the squad that loses its shape. Reading it as a smart opponent rather than a damage check is the first mindset shift that separates clean kills from wipes.
The boss also rewards patience over panic. When H1000 relocates, do not sprint after it into unknown contamination — let it come to you near cover you already control. A squad that dictates the ground, rather than chasing the boss, turns the mobility threat back on itself and keeps the exposure budget predictable.
Only Classified Mode, Near the Core Reactor
H1000 only spawns reliably in Classified mode runs on AZ3, found underground near the core reactor area. That placement matters for two reasons: it forces you into the most contaminated part of the map, and it puts the boss next to the reactor event and the elite Haavk enemies. If you queue Normal or Easy looking for H1000, you will not find a stable spawn — Classified is the mode that delivers the fight.
Classified mode also means tougher overall balance and better loot than the easier modes, so the H1000 run is a high-stakes raid on every axis at once. If you are learning the fight, watch a few cleared runs first, because the combination of radiation, variants, and the main boss is a lot to parse on a first attempt, and a failed Classified raid costs more than a failed Normal one.
The elite Haavk enemies in the reactor area are not decoration either. They guard the approach and will punish a squad that rushes the boss without clearing its path, so the H1000 raid is really a layered fight: variants, then elites, then the boss, all inside radiation. Plan for all three or expect to die to the one you skipped. Because the layers share one contaminated space, your route in matters as much as your loadout — enter from the side that lets you clear elites before the boss, keep the decontamination room on your exit path, and never let the squad string out where the dart and Haavk fire can isolate someone.
How the H1000 Fight Is Structured
Weaker Variants Spawn First
The fight is not a single enemy dropped into the room. Weaker H1000 variants show up first, and you need to clear those before the main H1000 appears. That warm-up wave is the filter: squads that burn their best ammo and gadgets on the trash variants arrive at the real boss weak, while squads that pace themselves reach the main fight with reserves.
Treat the warm-up as a resource check, not a warm-up in the casual sense. Burn low-tier ammo on the variants, save your best magazines and any damage gadgets for the main H1000, and keep at least one injector in reserve in case the fight drags you into a leak. Squads that empty their kit on the trash wave often fail the real test that follows.
The Main H1000 Appears After the Warm-Up
Once the weaker variants are down, the main H1000 enters. It dodges bullets, covers distance quickly, and uses a tranquilizer dart that punishes isolated players, so the fight rewards grouping up and focus-firing rather than splitting to flank. The movement and the dart are the two mechanics that wipe under-prepared squads, because a player pulled out of position by the tranquilizer is an easy kill for the boss.
Once the main boss is active, the priority order flips: group tight, fix the boss, and ignore side threats unless they are directly blocking a revive. The tranquilizer is the reset button H1000 uses on isolated players, so the moment someone is darted, the support should already be moving to cover them. A squad that understands this flip clears the fight in one clean phase instead of a drawn-out, exposure-bleeding slog.
Radiation Prep Before You Drop
Bring Anti-Radiation Gear for the Zone
Because the fight happens inside an active radiation zone, bring anti-radiation gear before you commit. A gas mask plus several injectors is the baseline for any H1000 attempt, and the deeper you push toward the core reactor, the more exposure you eat. Running out of decontamination options mid-fight is a common way to lose a squad that otherwise had the damage to win.
Players who want to stock injectors and masks for repeated H1000 runs can top up Delta Force on Topuplist via the Delta Force top-up page, because Topuplist delivers to PC, mobile, and console without breaking the cross-play flow of Season 10.
The mask lets you loot and fight deeper in the contamination, while injectors are your emergency reset if a push goes long. Do not rely on the decontamination room alone, because stepping into it pulls you out of the fight at exactly the moment the boss is most aggressive, and a squad that breaks formation to reset often eats the dart.
Manage Exposure During the Fight
Exposure does not pause because you are shooting a boss. The health drain from high exposure can outpace the healing you get from a support, so one player should watch the exposure meter and call for a reset before the team hits the danger zone. A squad that treats the radiation as a second enemy during the H1000 fight survives the attempts that pure damage squads lose.
A simple habit is to call exposure percentages out loud: when anyone crosses 50 percent, the injector carrier decides whether to pop or to rotate to cover. That single rule prevents the slow, silent deaths that look like boss damage but are actually radiation. The squad that talks about the meter beats the squad that only talks about the boss.
Loadout and Squad Composition
Weapons and Ammo to Bring
Bring weapons that can sustain fire and punch through the boss's mobility, not a slow precision rifle that whiffs on a moving target. Mid-range assault rifles and high-fire-rate options tend to perform better than single-shot marksman guns against H1000's dodging pattern. Pack extra ammo, because the warm-up variants plus the main fight can burn a surprising amount before the room is clear.
Avoid bringing a slow marksman rifle as your main weapon unless a teammate is covering with automatic fire, because the boss's dodging makes your shots whiff and your reload windows dangerous. A balanced four-stack usually runs two automatic rifles, one SMG for the variant clear, and one support weapon, which covers both phases without a dead role.
Role | Job in the H1000 Fight |
Mask Leader | Runs the gas mask, leads the push to the reactor |
Injector Carrier | Holds the anti-radiation stack, watches the exposure meter |
Support | Healing darts and full-health revives on darted teammates |
Angle Holder | Covers the elite Haavk enemies sharing the reactor area |
Role Split for a Four-Stack
Split roles before you drop: one player runs the mask and leads, one carries the injector stack and watches the exposure meter, one focuses healing and revives, and one holds angles against the elite Haavk enemies that share the reactor area. That role split keeps the squad functional when the boss pulls someone out of position with the tranquilizer. A four-stack with assigned jobs clears H1000 far more reliably than four players doing the same thing.
That split is not rigid, but the jobs must exist. A squad with no dedicated injector carrier loses the exposure war; a squad with no angle holder gets flanked by the Haavk elites; a squad with no support loses darted players. Assign the four jobs before you drop, not after the first death, because the fight gives you no quiet moment to reorganize once the main boss is active.
If you plan to farm H1000 on a schedule, you can top up Delta Force on Topuplist through the Delta Force top-up page and convert Delta Coins into the ammo and injectors the raid needs. Topuplist keeps delivery fast across every platform the fight supports, which matches the cross-play nature of Season 10.
Squad Tactics for the H1000 Fight
Focus Fire and Use Cover
Focus fire the main H1000 the moment it appears, and use the reactor-area cover to break line of sight when the tranquilizer dart starts flying. The boss's movement is the threat, so denying it clean lanes with cover and concentration of fire shortens the fight and lowers the exposure window. Do not chase a dodging boss into the open, or you trade a damage race for a radiation death.
The reactor area has enough structure to break line of sight, so use it instead of relying on raw healing. When the dart starts, the whole squad should step behind cover together so the darted player is not exposed while the support moves. Cover turns a lethal mechanic into a brief interruption rather than a squad-wiping event.
Watch the Tranquilizer and the Movement
The tranquilizer dart is the mechanic that ends runs, because it isolates a player and sets up a clean kill. Keep the squad tight so a darted teammate is instantly covered and revived, and call out the dart the moment it lands. The movement is the second tell — when H1000 closes distance, expect the dart next, so pre-position your support to respond.
Players who want to keep a steady raiding kit without grinding every node can top up Delta Force on Topuplist via the Delta Force top-up page so they never queue for H1000 under-geared.
The dart has a tell in the boss's animation, so a squad that studies the wind-up can pre-shift into a tight ball before it lands. That reaction time is the difference between a revived teammate and a permanent loss in Classified mode, where deaths hit harder and the extract is farther away than on easier maps.
The Loot and the 10-Minute Respawn
Gold-Tier Drops for the Risk
Defeating H1000 drops a large amount of high-value, gold-tier loot, which is what makes the fight worth the radiation and the combat risk. The payout is the reason squads repeatedly push the core reactor despite the danger, and it scales with the effort: a clean kill inside the contaminated zone returns more than most standard AZ3 containers.
The loot is the reason the fight exists as a farm target. A single clean H1000 kill can out-value several standard AZ3 container runs, which is why the risk profile is accepted by geared squads. The catch is that you have to extract with it, so the loot only counts once you are safe on the way out — dying to the exit radiation after the kill is the cruelest loss on the map.
Outcome | What You Get | Respawn |
Warm-up variants cleared | Ammo and gear from the trash wave | No drop |
Main H1000 defeated | Large gold-tier loot haul | Boss set returns ~10 min later |
Respawns Roughly Every 10 Minutes
After a kill, the boss set respawns roughly 10 minutes later, so timing your runs matters if you are farming it. A squad that learns the respawn window can chain attempts, clearing the warm-up, taking the main boss, looting, and resetting before the next spawn. Coordinate your AZ3 route around that 10-minute cycle to turn one lucky kill into a farming routine.
Plan the loop as clear variants, kill boss, loot, reset, repeat. Squads that internalize the 10-minute window stop treating H1000 as a one-time event and start treating it as a resource on a timer, which is where the real gold comes from. The respawn also means you do not need a perfect run to profit — a missed attempt just costs you ten minutes, not the whole session.
Coordinate the boss timer with the reactor event when both are active, because timing your shutdown push with a known respawn keeps the whole AZ3 run efficient instead of a series of disconnected fights. A squad that maps the 10-minute H1000 window onto its reactor and extraction plan turns one dangerous room into a repeatable routine.
Players who want to fund a longer farming session can top up Delta Force on Topuplist through the Delta Force top-up page and keep the raid stocked across the whole window.
Common H1000 Mistakes
Over-Committing Without Reset
The most common mistake is pushing the core reactor without a decontamination plan and dying to exposure after the boss is already dead. Clear the warm-up, take the main H1000, grab the gold loot, then use a decontamination room on the way out. Squads that forget the exit reset lose the haul to the environment, not the boss.
Another version of this mistake is looting too long inside the zone. The gold drop tempts players to keep opening boxes near the reactor, but every extra second in the contamination is a roll of the exposure dice. Loot the boss, grab one or two nearby containers if your meter allows, and leave — the respawn gives you another shot in ten minutes.
Ignoring Exposure Mid-Fight
The second mistake is treating radiation as background during the fight. High exposure drains health continuously, and a support's healing cannot outrun it forever. One player must own the exposure meter and call resets, because a squad that ignores the meter will collapse in the middle of an otherwise won fight.
The fix is cultural, not mechanical: make exposure a callout like any enemy position. When the injector carrier says "reset now," the squad rotates, even if the boss is at half health. A half-finished boss that respawns in ten minutes is recoverable; a wiped squad that loses its kits and loot is not.
You can also check the official Delta Force announcement page for any H1000 balance or spawn changes, because boss tuning can shift the warm-up count, the dart behavior, and the loot table after launch.
FAQ:
Where does H1000 spawn?
H1000 spawns reliably in Classified mode runs on AZ3, found underground near the core reactor area. It does not have a stable spawn in Normal or Easy Operations.
Do I need to clear weaker enemies first?
Yes. Weaker H1000 variants appear first, and you must clear them before the main H1000 enters the fight.
Why is radiation gear required for H1000?
The boss fight happens inside an active radiation zone near the core reactor, so a gas mask and anti-radiation injectors are needed to survive the exposure during the fight.
What does H1000 do to players?
H1000 dodges bullets, moves quickly, and uses a tranquilizer dart that punishes isolated players, so grouping up and focus-firing are the core counters.
What loot does H1000 drop?
Defeating H1000 drops a large amount of high-value, gold-tier loot, which is the main reward for the radiation and combat risk.
How often does H1000 respawn?
The boss set respawns roughly 10 minutes after a kill, so timing your farm runs around that window lets you chain attempts.
What weapons work best against H1000?
Mid-range assault rifles and high-fire-rate options outperform slow precision rifles against the boss's dodging movement. Bring extra ammo for the warm-up and the main fight.
Can I fight H1000 solo?
It is possible but risky. The tranquilizer dart and the elite Haavk enemies in the reactor area make a four-stack with assigned roles far more reliable than a solo push.
Is H1000 on mobile and console?
Yes. Season 10, including AZ3 and H1000, launched on PC, mobile, and console on June 30, 2026, with cross-play across those platforms.
Does H1000 loot respawn with the boss?
The boss set respawns about every 10 minutes, and a fresh kill drops gold-tier loot again, so the farming loop is tied to the respawn window.
