


Clash of Critters Horde Invasion Guide: Parting Gift Strategy & Season Mechanics (2026)
A Clash of Critters Horde Invasion ranking guide covering season mechanics, positioning, and the Parting Gift core strategy.
Want to push your Horde Invasion score without stressing over resources? Recharge Pinball and growth materials for Clash of Critters through the official Topuplist login top-up service — our team logs into your account and delivers the top-up directly, so you keep playing while we handle the recharge. Here is the actual scoring playbook.
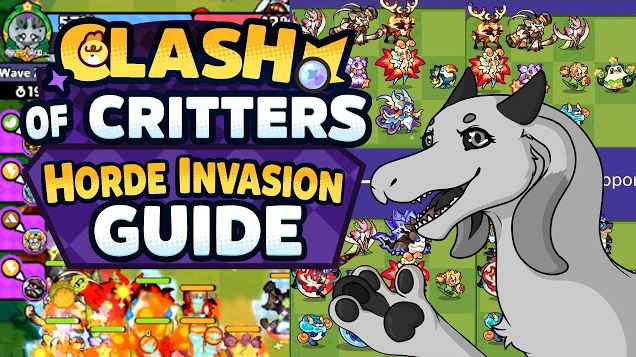
What Horde Invasion Is
Horde Invasion is Clash of Critters' two-player co-op PvE mode: you and one teammate hold the line against waves of Zobos (the zombie critters). Each round runs 25 waves (or 750 kills), and your event score is your best result across the 3 rounds you can play per session. It is the core late-game source of growth materials, exclusive avatar frames, and leaderboard placement. Because scoring rewards both how deep you go (difficulty) and how many you kill, the best runs are the ones where your board stays alive long enough to keep farming.
A useful detail many players miss: there are 4 selectable difficulties. Beating a difficulty for the first time does not consume one of your 3 daily rounds, so you can safely attempt a higher tier to unlock it without penalty. The leaderboard ranks you by season-best difficulty and total kills — a handful of kills on the hardest tier outranks a full clear on an easy one, so depth matters more than raw volume.
2026 Season Changes (What Got Reworked)
The biggest mistake players make in late 2026 is still running the pre-rework playbook. After Update 0.46.1, Horde Invasion moved from an open, endless format to a structured season system. The table below summarizes what changed.
Change | What It Means Now |
Open anytime → Season system | Fixed 3-hour windows with a 1-hour cooldown between them; the event recurs on that cycle |
Double Lawn Mower removed | Both players can no longer each bring a Lawn Mower in the same match |
Chips are permanent | Randomized buffs appear at every 5th wave (5 / 10 / 15 / 20 / 25) |
Leaderboard + frames | Ranked by season-best difficulty and kills; exclusive avatar frames at season end |
Longer active window | The playable window grew from roughly 2 hours to 3 hours per session |
The old high-score "double-mower" setup is dead. The current mainstream approach is the Parting Gift loop described below. Also note: if your camp (or your partner's) is under Zobo attack during the event, you cannot interact with it until the run ends — plan your upgrades beforehand.
How a Horde Run Flows
A run starts with both players deploying a shared board of up to ten Tatari across front, mid, and back rows. Waves of Zobos pour in from the lanes; you spend Energizer to upgrade and revive units between waves. Chip-bearing bosses appear at set milestones — the first is on Wave 5 — and the Sandworm boss lands on Wave 15. Because each round is a fixed 25 waves, your goal is to survive as deep as possible and bank your strongest result; your season-best difficulty and kills are what the leaderboard tracks.
The tempo matters as much as the lineup. Early waves (1–4) are light and exist mainly to let you stage your formation and bait the Wave 5 boss card. Waves 6–14 ramp steadily, and this is where your frontline Level 7 target should be met. The Wave 15 Sandworm is the first real test of positioning, and the chip bosses at 5 / 10 / 15 are where big Energizer swings happen. Treat the run as three acts — setup, scaling, and endurance — and your decisions at each act change accordingly. Rushing upgrades in the setup act or hoarding them in the endurance act are the two most common ways a run falls short of its potential.
For a steady supply of the Pinball and Candy you burn building your Horde board, the official Topuplist login top-up service for Clash of Critters is the straightforward route — share your account details with our staff and we recharge it for you, no store-price markup hassle.
The Core Scoring Play: the Parting Gift Strategy
How Parting Gift Works
Parting Gift is a blue chip: when one of your Tatari is defeated, it returns 100 Energizer. That 100 can immediately go into your next Tatari, so a death is not a loss — it is a snowball. The play works best when both players hold the card; each of you farms refunds and the whole board's resource efficiency takes off. One copy is enough to function, but two lets both sides harvest.
How to Farm the Card (Wave 5 First Boss)
Ideally, both players get Parting Gift before Wave 5. The first chip boss on Wave 5 drops the opening card choice. If that card is blue and is Parting Gift, commit. If not, do not grind a bad run — pull your troops to one side, let about 10 enemies pass through to end the run quickly, then reset and try again. Chain runs with a fixed partner for a few hours and both of you will land it.
Keep in mind the first boss can offer Rainbow, Gold, or Blue chips, so the setup starts with RNG — if neither player gets it, just run your normal formation instead of forcing a trick that is not there.
Keep Weak Units in the Front
Once you have Parting Gift, the trick is letting weak units die to trigger the refund. Pull your strong units back one row and put your three weakest in front — units like Sunflower, Shroom, and Wave Flutter are common picks because they fold fast. Two cautions: do not over-level Sunflower — at Level 3 she gains a heal and becomes hard to kill, which fights the strategy; and keep your Cheerling away from those front weaklings so it does not keep them alive.
Upgrade Your Strong Units First
Weak units exist to "produce refunds," so your resources should go to the units that must survive and deal damage. Prioritize the frontline first — Mantis, Owl, and Frog are reliable anchors — then your main damage dealers such as Poop Beetle, Tidian, and Bud Bow. As the run goes on, push your important units toward Level 7; only throw a few levels into weak units if the front line is about to collapse.
The Equalizer Chip Trick
If you draw the Equalizer chip mid-run, it resets ALL your deployed Tatari to Level 4 at once. The efficient play is to deploy many low-level units (Level 1–2) before Wave 5, then grab Equalizer to rocket them all to Level 4 simultaneously — a huge free power spike that saves a pile of Energizer. Timing matters: a well-prepared board of weak units turns one chip into a full-level jump across your whole formation.
Where the Extra Energizer Goes
Your Level 7 frontline comes first, because the rebuilt board has to survive the enemy stack you created while farming. After the frontline hits its target, restore the formation one unit at a time and feed the DPS breakpoints needed for the final waves. Do not mash the first glowing upgrade — every purchase should have a job in the last waves.
The Refund Math (Why It Works)
The refund payout stays fixed while the revive bill scales with the unit's temporary level. A cheap Level 1 sacrifice returns 100 Energizer for a ~100 revive, leaving the most net gain; a heavily upgraded Tatari still loops positively but at a thinner margin. Control which unit falls and you keep extra Energizer every cycle for the rest of the board.
Element Coverage Beats Raw Level
Success in Horde Invasion is less about having the highest-level Tatari and more about elemental coverage, crowd control, sustain, and coordination. A balanced board covers multiple elements so no single Zobo type hard-counters you. A commonly recommended role split looks like this:
Role | Priority Units | Why |
Frontline / Tank | Mantis, Owl, Frog | Must survive incoming waves and anchor the line |
Support / Heal | Solaflora, Cheerspring, Chronerva | Sustain keeps the board alive through long runs |
DPS / Control | Poop Beetle, Tidian, Bud Bow, Voltmare, Waveflutter | Deal damage and control lanes |
The exact formation does not need to be identical every time — your available critters, their tiers, and your teammate's setup should decide who you bring. The principle is to fill the roles your partner is missing: if they already bring strong Fire damage, you cover Lightning, Grass, Rock, or Water instead.
Concretely, a Fire-heavy board melts Grass Zobos but gets walled by Water ones; a Lightning carry shreds Water but struggles into Rock. The fix is not one perfect unit but two or three elements represented at once so every wave has a hard counter online. This is also why the Parting Gift loop pairs so well with coverage: the Energizer you farm lets you push a second-element carry to Level 7 without starving your frontline. When you and your partner compare boards before the run, aim for overlap on at most one element and complementary coverage on the rest. A paired Fire-plus-Lightning board with Grass and Rock backup handles far more wave types than two near-identical boards ever could.
Important: some support and control units are dependent on their Tier 3 or Tier 4 evolutions to shine. Waveflutter, for example, is a weak utility unit without its evolution but becomes a crowd-control anchor with it. Copying a veteran's lineup without the same evolutions will feel much weaker — invest in the evolution paths before relying on the synergy.
The Revive Economy: Why Energizer Is the Real Currency
On the surface Horde Invasion looks like a damage race, but the hidden currency is Energizer. Every upgrade between waves costs Energizer, and every revive costs Energizer scaled to the unit's temporary level — cheaper for low-level units, pricier for upgraded ones. The board that manages Energizer best is the board that scales deepest.
This is exactly why Parting Gift flips the math. Without it, a defeated unit is gone and its upgrade investment vanishes. With it, the defeat returns 100 Energizer you can route into a unit that is still alive. The discipline is to sacrifice only what you can afford to lose — a Level 1 weakling costs about 100 to revive, so the loop is nearly net-zero on that unit while feeding the rest of the board. Push that same unit to Level 5 and the revive bill climbs, shrinking your margin.
Good Horde players treat Energizer like a budget: they decide before the run which units are "expendable fodder" and which are "protected investments," then never cross those lines. They also avoid over-upgrading the front fodder — a Sunflower that hits Level 3 heals and stops dying, breaking the refund loop. And they resist reviving a fodder unit at a high level just because it is convenient; if reviving costs more than the refund, the cycle is worse than doing nothing. Keeping this economy tight is what lets a coordinated pair push into the highest difficulties instead of stalling at the mid waves.
Difficulty Selection and When to Push
Difficulty is selectable in the season system, and it directly sets your scoring ceiling. Early on, clear the highest difficulty you can survive consistently rather than brute-forcing one you fail — a completed lower-difficulty run still banks chips and frames, while a failed high-difficulty run banks little. As your roster and the Parting Gift loop improve, step the difficulty up one tier at a time. The leaderboard rewards season-best difficulty and total kills, so a steady climb beats a single lucky deep run that you cannot repeat.
Chips and Milestone Rewards
Chips drop at chip-bearing bosses every 5 waves (commonly 5 / 10 / 15 / 20 / 25) and provide effects like raising Tatari caps, breaking level limits, or special buffs — a major variable for late-game scoring. Each player can hold up to 3 chips (6 total across both players), and rarity is random (Rainbow, Gold, Blue), with rarer chips being stronger. Notable examples include Photosynthesis (passive Energizer over time, lets Tatari reach Level 8), Bounty Hunter (Energizer per kill in a window), Element Forms (big damage boost to one element), Lawn Care (spawns single-use Lawn Mowers), and Equalizer (reset all deployed Tatari to Level 4).
Among current chips, the ones that return resources immediately (Parting Gift-style or reset-style effects) are valued most after the 2026 tuning, because they keep your economy moving instead of just adding static stats. Once you have a chip, don't spend it blindly; align it with your main carry's route. A damage-focused board gets the most from a chip that extends its survival or breakpoints, while a control-heavy board benefits more from a chip that shortens ability cooldowns or widens crowd-control coverage. Read what your run is missing at the moment you pick, not what looked good on paper at the start.
Season-end leaderboard rank and major milestones both grant exclusive avatar frames, which double as status symbols and long-term goals. Because the leaderboard scores season-best difficulty and total kills, the frames effectively record how deep and how consistent your runs were across the whole season — another reason to climb difficulty steadily rather than gamble on one unrepeatable deep run. The Top 10 earn the rarest frames; lower brackets (such as 11–50) receive distinct ones.
Positioning and Boss Control
Positioning is where good teams separate from great ones:
Protect your supports. Units like Tideon, Panda, Cheerling, and Waveflutter need to stay behind the frontline; losing a support late-game usually causes immediate collapse.
Move before the Sandworm. The Wave 15 Sandworm drags backline units directly into the frontline, which can shatter support positioning. Reposition often and keep your healers away from the edges it can pull.
Pull bosses closer on purpose. Opening a path lets your DPS target bosses faster instead of wasting hits on small enemies blocking the lane.
Cover overloaded lanes. When a lane gets swamped, shuffle Tatari to help your teammate rather than letting one side collapse.
Learn when to let a tanky boss walk. Against extremely tanky late bosses, intentionally letting one through can be safer than wiping your whole formation trying to stop it.
If your board collapses too fast, the usual culprit is ability timing — sync your guardian level-ups to cover brief gaps, and value slow, control, and healing more than you would in a short boss fight. A useful habit is to keep one mobile control unit free to plug whichever lane is about to break, rather than committing every unit to a fixed row from the start. The enemy density spikes sharply after the first few bosses, so the board that stays flexible outlasts the board that looks perfect on paper.
Weak-unit placement also interacts with positioning. Because Parting Gift wants your weakest three in front, you should cluster them in one lane so they die together and refund together, rather than sprinkling them across the board where they die one at a time and waste the window. Pull your protected carries to the opposite side, and let the fodder lane act as a deliberate drain. This concentrated setup is far easier for your partner to read and support than a scattered one.
Matchmaking and Teaming Tips
Fixed partner first. The Parting Gift loop depends heavily on both sides syncing, which random queue rarely achieves. Add a steady duo if you play often.
Queue when you can communicate. The mode pairs you with another available player (friend invite or random). An active, talking partner beats passive matchmaking every time — coordinate roles before the run.
Don't all-in upgrades before Wave 5. Keep a few weak units alive (barely) specifically to trigger refunds — that is the scoring rhythm.
Communicate roles. Tell your partner what you are bringing so you cover all elements instead of doubling up.
Adapt as the roster grows. New Tataris and evolutions shift the meta with every update, so revisit your board and chip choices rather than locking one formation forever. A flexible pair that re-optimizes each season will outscore a rigid pair running last month's build.
Beginner Mistakes to Avoid
Still running double Lawn Mower. Banned in the same match; the old high-score build no longer works.
Upgrading everything, keeping no weak units. No deaths means no Parting Gift refunds and a resource dead end.
Getting Parting Gift too late. Past Wave 10 the card's value drops sharply — if you already survive that long, you may not need it.
Treating the round as endless. Each round is a fixed 25 waves; your score is your best of 3 rounds per session, so push depth within the round rather than expecting an infinite grind.
No communication in random queue. Without synced card farming the whole rhythm falls apart.
Ignoring element coverage. A board of one element gets hard-countered; spread your coverage and fill your partner's gaps.
Ready to climb the leaderboard? Top up Pinball and evolution materials for Clash of Critters through the official Topuplist login top-up service and let our team handle the recharge while you focus on the Parting Gift loop. Exact season dates and any mid-season balance tweaks follow the official site cc.farlightgames.com announcements.
FAQ
Q1: Is Horde Invasion PvP or PvE?
Pure co-op PvE. You and a teammate hold the Zobo waves; scoring is by kills and difficulty, not by fighting other players.
Q2: Do both players need Parting Gift?
Not strictly, but both holding it maximizes return; a single copy still works, just at a slower pace.
Q3: Why put weak units in front to die?
Because Parting Gift returns Energizer on defeat. Weak units are cheap and die easily, perfect for "snowballing" your strong units.
Q4: Can Lawn Mower still be used?
A single Lawn Care chip is fine, but both players cannot each bring one in the same match — the old double-mower high-score route is gone.
Q5: How many waves are in a Horde round, and how is scoring counted?
Each round is 25 waves (750 kills). Your event score is your best result across the 3 rounds you can play per session, ranked by season-best difficulty and total kills.
Q6: How are leaderboard avatar frames awarded at season end?
By season-best difficulty and kills. The Top 10 and the 11–50 brackets receive different-rarity exclusive frames.
