

Chizuru vs Fei in Chaos Zero Nightmare (2026) — Which Void DPS Is Stronger?

With Fei landing on Global servers on July 8, 2026, players are weighing whether to spend their hard-earned Crystals on the new Void Ranger or stick with their proven Void Psionic. Both are 5-star Void DPS, but they play completely differently — Chizuru delivers reliable sustained damage with AP efficiency, while Fei runs a complex Flame Dance combo engine that can unleash some of the highest burst damage in the game.

This guide breaks down their mechanics, builds, tier rankings, team compositions, and the real answer: it depends on your team, your playstyle, and how many Crystals you're willing to spend.
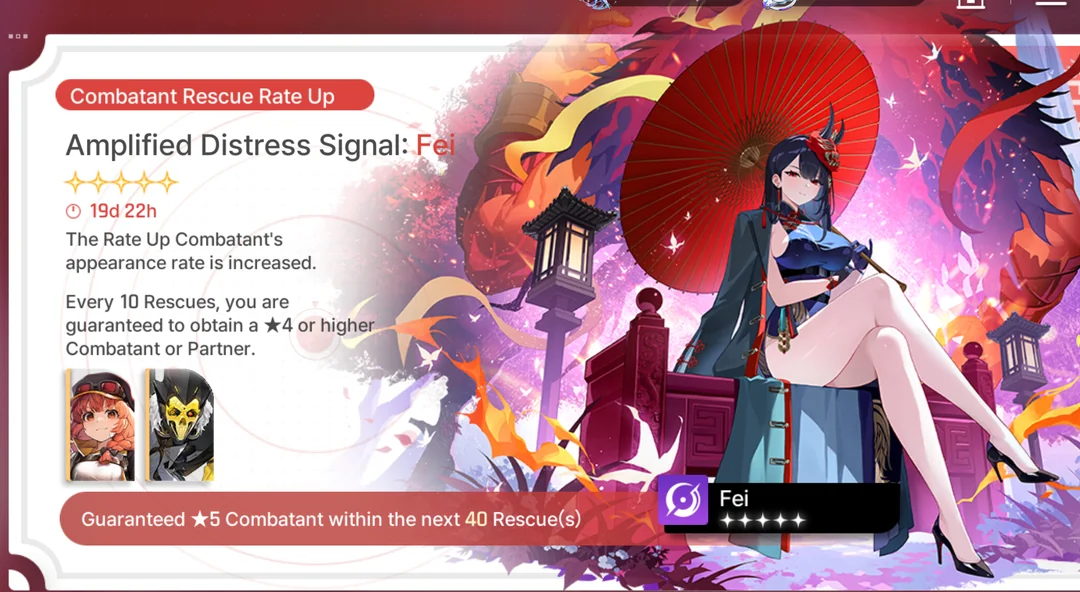
Quick Comparison — Chizuru vs Fei at a Glance

Attribute

Chizuru

Fei

Rarity

5-Star

5-Star

Class

Psionic

Ranger

Element

Void

Void

Faction

Peltion / Kaguya Pharmaceutical

Ark Collapse (new lore)

Core Mechanic

Will-O'-Wisp → Shadow of the Moon stacking

Flame Dance Melody → Descent → Wildfire burst

Damage Profile

Single-target sustained

Multi-hit burst combo

AP Efficiency

High — Bound at Dusk discounts 2 random cards by 1

Moderate — 0-cost Melody spam, but Wildfire needs 3+ AP

Self-Sustain

Yes — SOTM+ heals 5% Max HP

No

AoE Capability

None

Yes — Wildfire multi-hit + Melody chain

Ease of Use

Medium — debuff + Wisp management

Hard — recursive combo loop, deck cycling mastery

Banner Type

Limited

Limited (Global launch July 8, 2026)

Tier (czn.gg)

A-Tier

Not yet ranked (new release)

Tier (GameWith)

S-Tier

TBD

Best Partner

Itsuku

Veronica / Rei

Key takeaway: Same element, same rarity, completely different playstyle. Chizuru = reliable sustained DPS + utility. Fei = high-ceiling burst combo + deck engine.
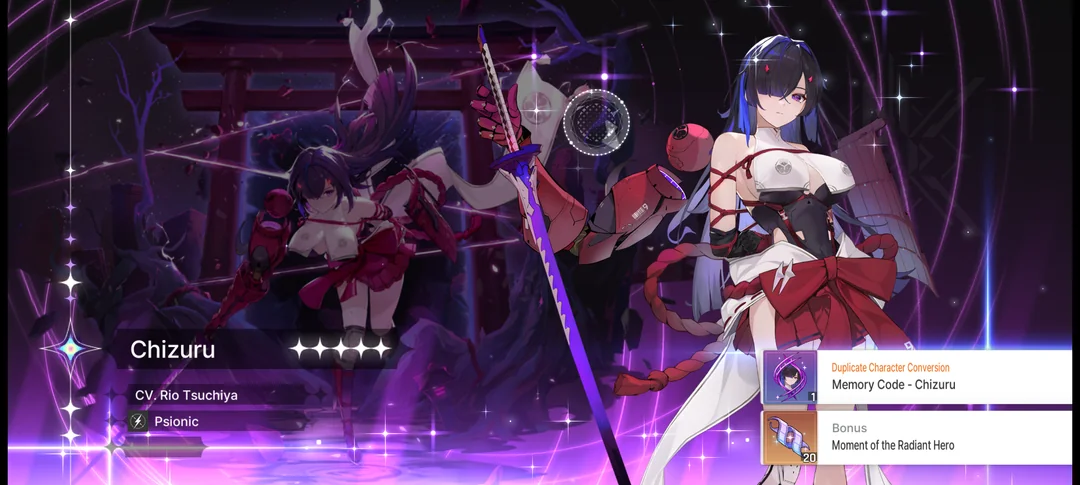
Chizuru — The Wisp-Fueled Moon Shadow

Core Mechanic: Will-O'-Wisp & Cursed Shackles

Chizuru's entire kit revolves around one loop: debuff → hit → generate Wisps → release Shadow of the Moon+.

  1. Apply Cursed Shackles using Karmic Flames — only ONE enemy can have Shackles at a time, and it transfers when reapplied to a different target

  2. Attack the Shackles target — every hit on a Cursed Shackles enemy generates Will-O'-Wisps

  3. Collect 5 Wisps → generates 1 Shadow of the Moon card (stacks up to 3 in a single card slot)

  4. Stack 3 Shadow of the Moon → transforms into Shadow of the Moon+ (SOTM+) — 95% DMG × 2 + 5% Max HP heal per Bind stack

  5. Excess Wisps beyond 5 don't waste — overflow carries over

The faster you hit, the faster you generate Wisps. That's why multi-hit teammates like Luke and Tressa are essential for Chizuru teams — their rapid attacks feed her Wisp engine.

Key Cards Breakdown

Card

AP Cost

Type

Core Effect

Best Epiphany

Karmic Flames

1

Attack [Initiation]

171% DMG + 1 Cursed Shackles

E3: Cursed Shackles +100% DMG Amount

Moonslash

1

Attack (Basic)

100% DMG (Potential 3-1: 60% × 2)

— (use Potential upgrade instead)

Spiritflame's Ward

1

Skill (Basic)

100% Shield

Remove this card first — zero synergy

Tsukuyomi

0

Skill

3 Wisp per Hit of next Attack Card

E5: [Unique/Lead], 2 Wisp per Attack Card used

Bound at Dusk

1

Upgrade [Initiation/Unique]

Inhibit + discount 2 random cards by 1 AP

E1: base effect; E5: discount highest-cost card by 2

Oni Hunt

1

Attack [Haste]

57% DMG × 4, +40% next Bind card DMG

E4: Create 2 Moonslash + Draw 1; E5: +40% SOTM+ DMG, 3 Wisp at turn start

Shadow of the Moon

1

Attack [Bind 1/Retain]

71% DMG, +21% per Bind stack

— (generated card, no Epiphany)

SOTM+ (generated)

1

Attack [Bind 3/Retain/Unique]

95% DMG × 2 + 5% HP heal, +20% per Bind stack

The Inhibit Trade-off — Why It Matters

Bound at Dusk grants Inhibit at the start of each turn: your team can't gain or lose AP except from Ravaging/Breaking enemies or card effects. This means:

  • Mika's AP generation becomes useless for Chizuru's team — you can't use Mika as an AP battery

  • But Inhibit is actually a benefit in Chaos mode — it acts as a "reverse Mika," letting Chizuru discount random cards every turn without worrying about AP overflow

  • In Save Data mode with optimized decks, Inhibit can feel restrictive — some players skip Bound at Dusk entirely in these scenarios

According to Prydwen's Chizuru guide, Inhibit is worth running in most content because the AP discounts and SOTM hit bonus outweigh the restriction.

Ego Skill — Moonlight of High Tide

Aspect

Detail

EP Cost

5

Base Damage

250%

Scaling

+50% DMG Amount per Shadow of the Moon created (max 10 stacks = +500%)

Maximum Potential

750% DMG (250% + 500%)

How to maximize: Don't fire your Ego on turn one. Wait until you've cycled through several SOTM generations — each creation adds +50% to the Ego's damage. Mid-combat deployment after 3-4 SOTM cycles can yield 450-550% total damage.

Manifest Ego Priority

Stage

Name

Effect

Priority

M1

Sleeping Memory

SOTM+ +20% DMG, +3% heal

★★

M2

Awakening Memory

Using SOTM+ creates 1 Shadow of the Moon

★★★ TOP PICK

M3

Vivid Memory

Ego +150% DMG

★★

M4

Inner Memory

Creating SOTM grants Lunarshard (+10% ATK card DMG, max 3)

★★★

M5

Complete Memory

Potentials +3 levels

M6

Liberated Memory

3 Lunarshard → SOTM+ +1 Hit

★★

Why M2 is the top pick: When you use SOTM+, it generates another Shadow of the Moon card — creating a loop where every SOTM+ release feeds the next one. This is Chizuru's core power spike.

Why M4 is the next priority: Lunarshard stacking adds up to +30% Attack card DMG. Three Lunarshards means every attack card in Chizuru's kit hits 30% harder — this is the E4 sweet spot.

Base Stats

Stat

Value

Attack

150

Defense

50

Health

85

Critical Chance

3.0%

Critical Damage

125.0%

Fei — The Flame Dance Combo Engine

Fei is the newest 5-star Void Ranger in Chaos Zero Nightmare, arriving on Global servers July 8, 2026 (CN servers May 28, 2026). She's not a traditional burst DPS — she's a deck cycling strategist who turns cheap 0-cost cards into devastating multi-hit chains.

Core Mechanic: Flame Dance + Descent + Advent

Fei's kit operates on three interconnected systems:

  1. Exorcism Stance (0 AP, Upgrade, Initiation) — injects 8 Flame Dance Melody cards into your deck + activates the Descent mechanic + draws 2 extra cards. This is Fei's turn-one setup card — it makes her entire engine possible.

  2. Descent — every card drawn outside the normal turn-start draw phase adds Descent +1. This is the fuel for Waltz.

  3. Flame Dance Waltz (0 AP, Skill, Exhaust/Unique) — converts Descent stacks into pulled Melody cards from the draw pile, each gaining +100% DMG as a temporary buff. The timing of Waltz is Fei's single most important decision point per turn.

  4. Advent Meter — accumulates from active draws. At 8 stacks, auto-generates Falling Ninth Heaven, Fei's burst payoff card.

  5. Wildfire (X AP, Attack, Unique) — 371% × (X+1) hits, and each hit triggers 1 Graveyard Melody from the discard pile. This is Fei's finisher.

The full rotation, as described:

  1. Turn 1 → Cast Exorcism Stance → inject 8 Melody, draw 2 extra, activate Descent

  2. Mid-combat → Accumulate Descent through extra draws (Veronica, Cassius, Rei help here)

  3. Burst setup → Cast Flame Dance Waltz → pull Melody from draw pile with +100% DMG per card

  4. Finisher → Cast Wildfire with 3+ AP → multi-hit chain + Graveyard Melody triggers from discard

Key Cards Breakdown

Card

AP Cost

Type

Core Effect

Best Epiphany

Exorcism Stance

0

Upgrade [Initiation/Unique]

8 Melody injection + Descent mechanic + Draw 2

E1: Keeps full 8 Melody + +50% DMG to each

Flame Dance Waltz

0

Skill [Exhaust/Unique]

Pull Melody from draw pile = Descent count, each +100% DMG

E1/E2: Restores card after use

Wildfire

X

Attack [Unique]

371% × (X+1) hits, each triggers Graveyard Melody

E2: Converts hits to Graveyard Melody activations

Flame Dance Melody

0

Attack

141% DMG + Draw 1

Recycles on Flame Dance 3-stack

Solo Dance

?

Skill

Draw 2, then discard 1+ cost cards

E2: Targeted search for Solo Dance + Rain Bell

Rain Bell

?

Attack

Includes 1 Melody + Draw 1

Wildfire AP Scaling

AP Invested

Number of Hits

Total Base Damage

1 AP

2 hits

371% × 2 = 742%

2 AP

3 hits

371% × 3 = 1,113%

3 AP

4 hits

371% × 4 = 1,484%

4 AP

5 hits

371% × 5 = 1,855%

Plus: each hit triggers 1 Graveyard Melody from discard (141% per trigger), adding hundreds of percentage points of bonus damage. A 3-AP Wildfire with 4 Graveyard Melody triggers can exceed 2,000% total damage in a single turn.

Ego Skill — Azure Sky

Aspect

Detail

Effect

Inject 8 flat Advent stacks instantly + next Falling Ninth Heaven +100% DMG

Strategic Use

Save for burst turn after stacking Melody and Descent

This is Fei's "go button" — press Azure Sky when you're ready to fire your Wildfire combo, and the Advent boost ensures Falling Ninth Heaven lands with maximum impact.

Manifest Ego (TBD — New Character)

Fei's Manifest Ego details are still being documented on Global servers following her July 8 launch. Based on Game8's Fei character page and preliminary community testing, E2 is expected to significantly improve Melody consistency (restoring Waltz after use), making it the likely sweet spot similar to Chizuru's M2. We'll update this section as data becomes confirmed — check back in 1-2 weeks.

Strengths and Weaknesses

✅ Strengths

❌ Weaknesses

Highest burst ceiling in the game when combo lands

Very high learning curve — 4-5 decision points per turn

0-cost engine cards (Melody, Stance, Waltz)

Deck pollution from 8 Melody — need aggressive thinning

AoE capability via Wildfire + Melody chain

Needs setup time — weak in fast/short fights

Graveyard Melody interaction adds hidden burst DMG

Low mistake tolerance — bad Waltz timing wastes entire combo

Card cycling mastery rewards skilled players

No self-sustain — relies on teammates for healing

Head-to-Head Comparison — 5 Key Dimensions

Dimension 1: Raw Damage Output

Scenario

Chizuru (E4)

Fei (E0)

Single-target sustained

Strong — SOTM+ loops every turn with 95% × 2 base + Bind scaling

Moderate — relies on Melody chain, less consistent per-turn output

Single-target burst

Good — Ego up to 750% with SOTM stacks

Exceptional — Wildfire 3AP + Graveyard Melody can exceed 2,000% in one turn

AoE

None

Good — Wildfire multi-hit + Melody chain spreads damage

Damage ceiling (max ME)

~127% multiplier at M6

Potentially highest in game if combo lands perfectly

Winner: Fei for burst, Chizuru for consistency

Dimension 2: AP Economy

Aspect

Chizuru

Fei

AP generation

Bound at Dusk discounts 2 random cards by 1 AP (Inhibit trade-off)

No direct AP generation — relies on Mika or other AP batteries

0-cost cards

Tsukuyomi (0 AP), Karmic Flames E5 (0 AP via Exhaust on kill)

Exorcism Stance (0 AP), all Melody cards (0 AP), Waltz (0 AP)

AP dependency

Low after setup — Inhibit makes team self-sufficient with card discounts

High for Wildfire turns — needs 3+ AP for maximum damage scaling

Winner: Chizuru — AP efficiency is her signature strength. Fei needs external AP support.

Dimension 3: Team Compatibility

Aspect

Chizuru

Fei

Best partners

Itsuku (E0: 118.92% synergy), Anteia, Eloise

Veronica (card engine), Rei (buffs + thinning), Hugo (follow-up), Mika (AP battery)

Void synergy

Rei + Tressa (Void team, 0-cost synergy)

Rei + future Adelheid (Void Vanguard synergy)

AP support

Can't use Mika (Inhibit blocks AP gain)

Needs Mika or other AP generators for Wildfire turns

Deck support

Needs card draw / thinning (Cassius, Hugo)

Needs even more card draw (Veronica, Cassius)

Winner: Tie — both need specific teammates, but Fei is more demanding in team construction.

Dimension 4: Ease of Use & Learning Curve

Aspect

Chizuru

Fei

Setup complexity

Medium — apply Cursed Shackles → stack Wisp → release SOTM+

High — Exorcism Stance → Descent stacking → Waltz timing → Wildfire payoff

Decision points per turn

2-3 (which target to Shackles, when to use Bound)

4-5 (Descent vs burst timing, Melody vs Wildfire, Advent threshold)

Mistake tolerance

Moderate — mismanaged Wisp just delays next SOTM

Low — bad Waltz timing or premature Wildfire wastes entire combo

Skill ceiling

High (different Epiphany builds for Chaos vs Save Data)

Very high (recursive engine optimization, Graveyard Melody math)

Winner: Chizuru — more forgiving. Fei rewards mastery but punishes mistakes harder.

Dimension 5: Value at Different Manifest Ego Levels

ME Level

Chizuru Impact

Fei Impact (Projected)

M0/E0

Solid sustained DPS, AP utility, self-heal

Functional but inconsistent — Melody acquisition issues without Waltz restore

M2/E2

Big jump — SOTM+ creates new SOTM (loop engine)

Expected: major consistency boost (Waltz restore after use)

M4/E4

Sweet spot — Lunarshard +30% ATK card DMG

Expected: significant DMG multiplier addition

M6/E6

SOTM+ extra hit — ~127% multiplier

Expected: maximum combo potential unlocked

Winner: Chizuru at E4 already feels complete. Fei may need E2+ to reach consistency.

Is Fei Stronger Than E4 Chizuru?

Direct answer: No, Fei is not strictly "stronger" — they serve different roles.

  • E4 Chizuru is already a top-tier investment. Lunarshard stacking (+30% Attack card DMG), AP efficiency from Bound at Dusk, self-sustain from SOTM+ healing, and consistent single-target damage. According to GameWith's tier list, Chizuru holds an S-Tier rating — you don't "need" Fei if Chizuru is carrying your Void team.

  • Fei has a higher theoretical damage ceiling but requires more setup, more team investment, and likely more Manifest Ego investment to reach consistency. She's also brand new — tier rankings are TBD, and Manifest Ego data isn't fully confirmed on Global yet.

  • If you enjoy complex combo engines and want the highest burst ceiling in the game → Fei is worth pulling

  • If you prefer reliable sustained DPS + AP utility + self-sustainE4 Chizuru is already enough

  • Best case: they're both Void element — you can run them together, and Chizuru's AP discounts directly help Fei's expensive Wildfire turns

The real question isn't "who's stronger" — it's "which playstyle fits your team and how many Crystals are you willing to spend?"

If you're deciding whether to pull Fei and need Crystals fast, you can top up Chaos Zero Nightmare on Topuplist — secure, login-based processing with discounted bundles.

Best Void Team Compositions Featuring Both

Team 1 — Chizuru Hyper-Carry Void Team

Slot

Character

Role

Why

Main DPS

Chizuru (E4)

Wisp engine + sustained DMG + AP discount

Core carry — Lunarshard stacking makes every hit stronger

Support

Rei

Buffs, Morale, deck thinning

Snack Time draws extra cards → faster SOTM generation

Sub-DPS

Tressa

0-cost attacks for Wisp generation

Shadow Reload builds hit Shackles targets for free → Wisp fuel

Flex

Hugo or Luke

Follow-up attacks / card draw

Multi-hit attacks generate Wisp; Hugo provides card draw

Strengths: Reliable, self-sustaining, Chizuru's AP discounts help the whole team. czn.gg recommends this as Chizuru's most consistent team composition.

Team 2 — Fei Burst Engine Void Team

Slot

Character

Role

Why

Main DPS

Fei

Flame Dance combo + Wildfire burst

Core burst engine — highest ceiling when combo lands

Card Engine

Veronica

Ballista + Draw 2 for Advent stacking

Rapid card cycling turbo-charges Advent meter

Buff/Thin

Rei

Morale buffs + deck thinning

Universal Void support — buffs apply to Fei's Void element

AP Battery

Mika

AP generation for Wildfire turns

Fei needs 3+ AP for maximum Wildfire scaling — Mika provides it

Strengths: Explosive burst turns, Veronica + Rei turbo-charges Fei's Advent meter for faster Falling Ninth Heaven generation.

Team 3 — Double Void DPS (Chizuru + Fei)

Slot

Character

Role

Why

DPS 1

Chizuru (E4)

Sustained DMG + AP discounts

Bound at Dusk discounts help Fei's Wildfire turns

DPS 2

Fei

Burst combo

Wildfire benefits from Chizuru's card cost reductions

Support

Rei

Universal Void buff engine

Morale buffs + thinning apply to both Void DPS

Flex

Mika or Veronica

AP / card engine

Mika feeds Fei; Veronica cycles cards for Advent

Strengths: AP discounts from Bound at Dusk directly benefit Fei's expensive Wildfire turns. Both Void = Rei buffs apply to both characters simultaneously.

Caveat: Inhibit from Bound at Dusk blocks Mika's AP gain for the team — but Chizuru's card discounts partially compensate. Test carefully in-game to confirm the interaction. If Inhibit doesn't block Mika's AP for Fei specifically (each combatant tracked separately), this could be the strongest Void team in the game.

Build Recommendations — Equipment & Memory Fragments

Chizuru Best Gear

Slot

Recommended Item

Why

Memory Fragments

Executioner's Tool (2pc) + Black Wing (2pc) + Flex (2pc)

Safe all-mode choice — unconditional +25% CRIT DMG + 12% ATK

Alternative Fragments

Conquerer's Aspect (4pc) + Cursed Corpse (2pc)

Highest DMG potential, but Bound at Dusk discounts disqualify cards from Conqueror's bonus

Weapon

Criticism of Discord (Mythic)

Massive passive ATK boost — best general-purpose weapon

Weapon (alt)

Mutant Predator Spike

Recommended by czn.gg for consistent performance

Armor

Fairy King's Crown

Flat CRIT Rate for SOTM+ consistency

Accessory

Verdant Day/Night

Huge DMG boost, odd/even round swap mechanic

Sub-stats priority: CRIT Rate% = CRIT DMG% > ATK > ATK%

Fei Best Gear

Slot

Recommended Item

Why

Memory Fragments

Executioner's Tool (2pc) + Black Wing (2pc) + Cursed Corpse (2pc)

Aggressive 2+2+2 stacking — no signature 4pc set yet for Fei

Weapon

Foggy Crystal Ball

Boosts 0-cost Attack card DMG — directly scales Melody + Falling Ninth Heaven

Armor

Fairy King's Crown

Flat CRIT Chance for multi-hit Wildfire consistency

Accessory

Heart of the Jewel

+1 modifier to X-cost cards → scales Wildfire hits exponentially

Sub-stats priority: CRIT Rate% > ATK% > CRIT DMG% > Void DMG%

Note: Fei's optimal Memory Fragment sets may change as more data becomes available post-launch. The Game8 Fei page will likely have updated recommendations within 1-2 weeks.

Common Mistakes to Avoid

Chizuru Mistakes

#

Mistake

Fix

1

Keeping Spiritflame's Ward

Remove it first — zero synergy with her kit, wastes a card slot

2

Using Mika in Chizuru team

Inhibit blocks AP gain — Mika becomes useless. Use card-discount supports instead

3

Applying Cursed Shackles to wrong target

Only one enemy can have Shackles — pick the one your team will hit most

4

Ignoring Bound at Dusk

Skipping it loses AP discounts AND SOTM hit bonus — it's core, not optional

5

Using Ego too early

Moonlight of High Tide scales +50% per SOTM created — wait for mid-combat

6

Not prioritizing Potential 3-1

Moonslash 60% × 2 is essential for Wisp generation — upgrade it ASAP

7

Running Chizuru without multi-hit teammates

Solo Wisp generation is slow — pair with Luke/Tressa for Wisp fuel

Fei Mistakes

#

Mistake

Fix

1

Using Wildfire before stacking Descent

Descent = free DMG multiplier via Waltz — stack 2+ Descent first, then burst

2

Not trimming basic cards in Chaos

8 Melody pollutes your deck — aggressively remove basic cards to thin it

3

Using Waltz at 0 Descent

Pulls zero Melody from draw pile = wasted turn — wait for 2+ Descent stacks

4

Skipping Solo Dance replication in Save Data

2-3 copies ensure consistent turn-1 Exorcism Stance setup

5

Not using Azure Sky (Ego) strategically

8 Advent + 100% DMG boost is massive — save for burst turn, not random fire

6

Running Fei without card draw support

Veronica/Cassius essential for Advent meter — without them, Fei stalls

7

Forgetting Graveyard Melody interaction

Wildfire hits trigger spent Melody from discard — this is hidden burst DMG

Should You Pull Fei If You Already Have E4 Chizuru?

Decision framework — match your situation to the recommendation:

Situation

Recommendation

Why

You have E4 Chizuru + solid Void team

Skip Fei

Chizuru + Rei + Tressa/Luke is already competitive at S-Tier

You love complex combo playstyles

Pull Fei

Highest burst ceiling in the game if you master her engine

You need AoE DPS

Pull Fei

Chizuru has zero AoE — Fei's Wildfire + Melody fills that gap

You're building a Void team for future Adelheid

Pull Fei

Fei + Adelheid synergy is projected to be top-tier per Vortex Gaming

You're low on Crystals

Save

E4 Chizuru is already strong; Fei likely needs E2+ for consistency

You want both in one team

Pull Fei

Chizuru's AP discounts directly help Fei's Wildfire — strongest combo potential

Need Crystals for Fei's banner? Top up Chaos Zero Nightmare on Topuplist for fast, secure delivery at discounted rates — no VPN required, login-based processing.

FAQ

Q1: Is Fei stronger than Chizuru at the same Manifest Ego level?

A: Not strictly. Fei has higher burst potential (Wildfire can exceed 2,000% DMG in one turn) but Chizuru offers more consistent sustained damage plus AP utility. At E4/M4, Chizuru's Lunarshard stacking (+30% Attack card DMG) makes her very competitive even against Fei's ceiling.

Q2: Can Chizuru and Fei be on the same team?

A: Yes — both are Void element and their mechanics can synergize. Chizuru's Bound at Dusk discounts help Fei's expensive Wildfire turns. However, Inhibit from Bound at Dusk may affect team AP flow — test the interaction carefully. Rei as the shared support buffs both Void DPS simultaneously.

Q3: What's the minimum Manifest Ego for Fei to feel good?

A: E2 is likely the sweet spot (similar to Chizuru's M2 giving the SOTM loop). Below E2, Fei's Melody consistency issues — particularly Waltz not restoring after use — can make her feel clunky. E2 expected to add Waltz restore, making her combo engine much smoother.

Q4: Who are the best teammates for a Void team in CZN?

A: Rei is the universal Void support — her Morale buffs and deck thinning benefit both Chizuru and Fei. For Chizuru: add Tressa or Luke (0-cost Wisp fuel). For Fei: add Veronica (card engine) or Mika (AP battery). czn.gg's Chizuru build page has detailed team composition recommendations.

Q5: Is Chizuru still worth investing in after Fei's release?

A: Absolutely. Chizuru's AP efficiency and self-sustain are unique — no other character provides that combination in CZN. Fei doesn't replace her; they complement each other. Chizuru holds S-Tier on GameWith and A-Tier on czn.gg — her ranking hasn't dropped post-Fei release.

Q6: How do I get Crystals for pulling Fei or Chizuru?

A: Free sources include story quests, daily/weekly missions, and event rewards. For faster accumulation — especially during limited banners with 60-pull pity — you can top up CZN Crystals on Topuplist with discounted bundles, fast delivery, and secure login-based processing.

M

Mason Reed is a gaming news and leaks writer focused on live-service titles, gacha games, shooters, and action RPGs. He follows official announcements, beta builds, community discoveries, and patch note changes to turn fast-moving rumors into clear, readable updates. His reporting style separates confirmed details from speculation, helping readers understand what is verified, what is likely, and what is still being discussed. Mason specializes in version previews, banner speculation, event roadmaps, balance changes, hidden content discoveries, and breaking game news. Before publishing, he cross-checks social posts, test-server information, developer updates, and community findings, then revises articles as new evidence appears. His goal is to give players the clearest possible picture of what is coming next, without unnecessary noise or confusion.

Los Angeles, California
Gaming NewsLeaksDataminesPatch PreviewsLive-Service GamesAction RPGGacha GamesShooter GamesEvent CoverageSpeculation